5 Tips For Better Climbing Photos
Did you just send your difficult project, and are ready to tell the world? Or did you just get back from a week in the alpine, stemming and jamming your way in a remote mountain range? But when you start going through your photos to show your friends, you fine they are….lacking. Blurry photos, belayer butt shots, and climbers blended into a background of vague rocks. Your photos don’t give your climb the justice it deserves. Well, here are some things that may help:
Tip 1: Tether your Camera!
The two most important things when it comes to taking climbing photos is access to your camera, and security of it. If you have to fumble around to the bottom of your pack to grab your camera, you’re probably going to miss that great shot. Even worse, you’ll create a frustrated partner as you spend your time rummaging. If your phone is unsecured in a pocket, or you’re one-handing your new mirrorless camera, the possibility of dropping it is not only a financial pain, but a safety hazard as well. Having a good tethering system will allow you to access your camera quickly when a shot appears, and not have the fear of watching your photos tumble down a cliff.
Phone Options:
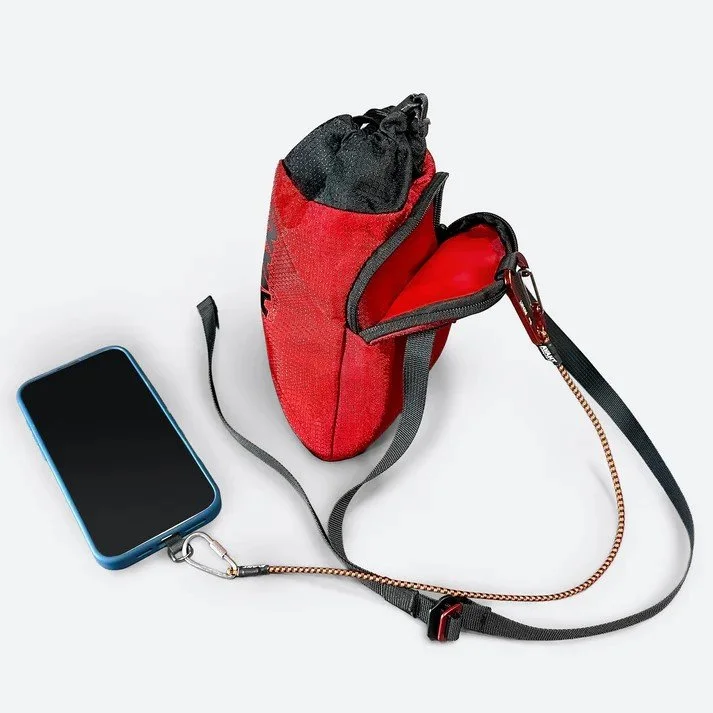
Avant “Tech-Tether”: This is my go-to option for my phone. It is universal and works with nearly any phone that has a case(as most sane people do). The length is ideal and has stretch, catching your phone just like a rope would for you. I either secure it to my belt loop and put the phone in a pocket, or use the “Snack Pack”. The disadvantage of having it in a pocket is that it leaves the tether exposed, and can get caught on things hanging off your harness. They now have a locking carabiner one that I would recommend, as I have had mine come unclipped before.
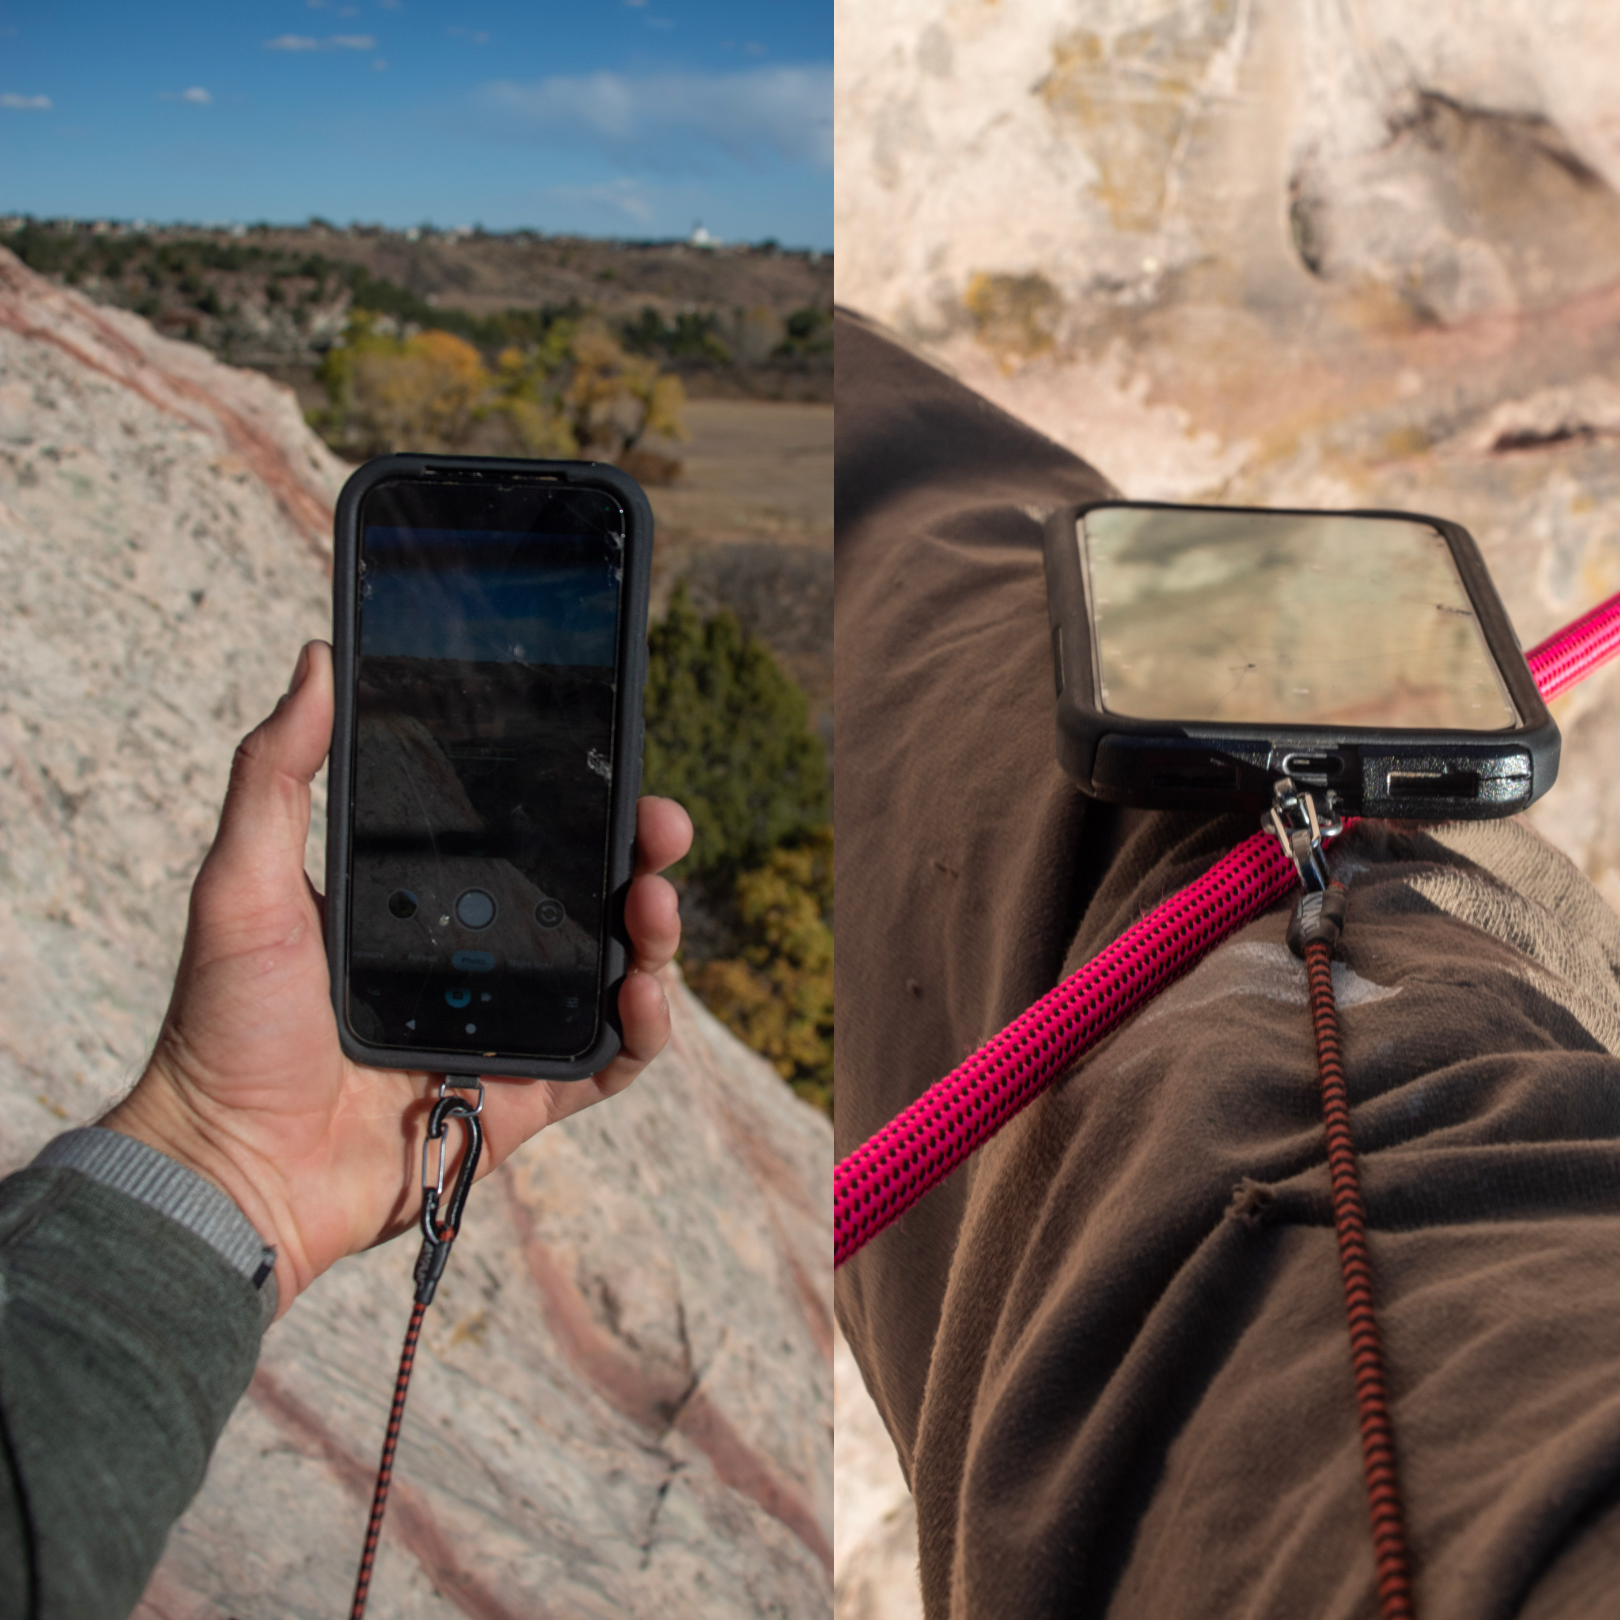
Phone Necklace: You can find several options on Amazon(or make one yourself). Any tether that has an attachment that fits behind a case, with a loop that comes down by the charging port, are generally pretty secure. The advantage of the necklace is it’s out of they way of your harness, and you don’t have to try to fit it in and out of your pockets. This can be helpful during hanging belays. The disadvantage is if you’re a hot weather climber who wears thin shirts, or no shirt at all, it will dangle around which can get annoying as you’re cruxing out.
Koala Strap: I’ve found these to be a little unreliable. It fits around the outside of the phone. It’s not as universal, fitting better on some phones than others. I found it can come off fairly easily going in and out of pockets. It also can move around and cover you camera, which is frustrating when you go to take that quick photo and end up missing it because half your lens is covered.
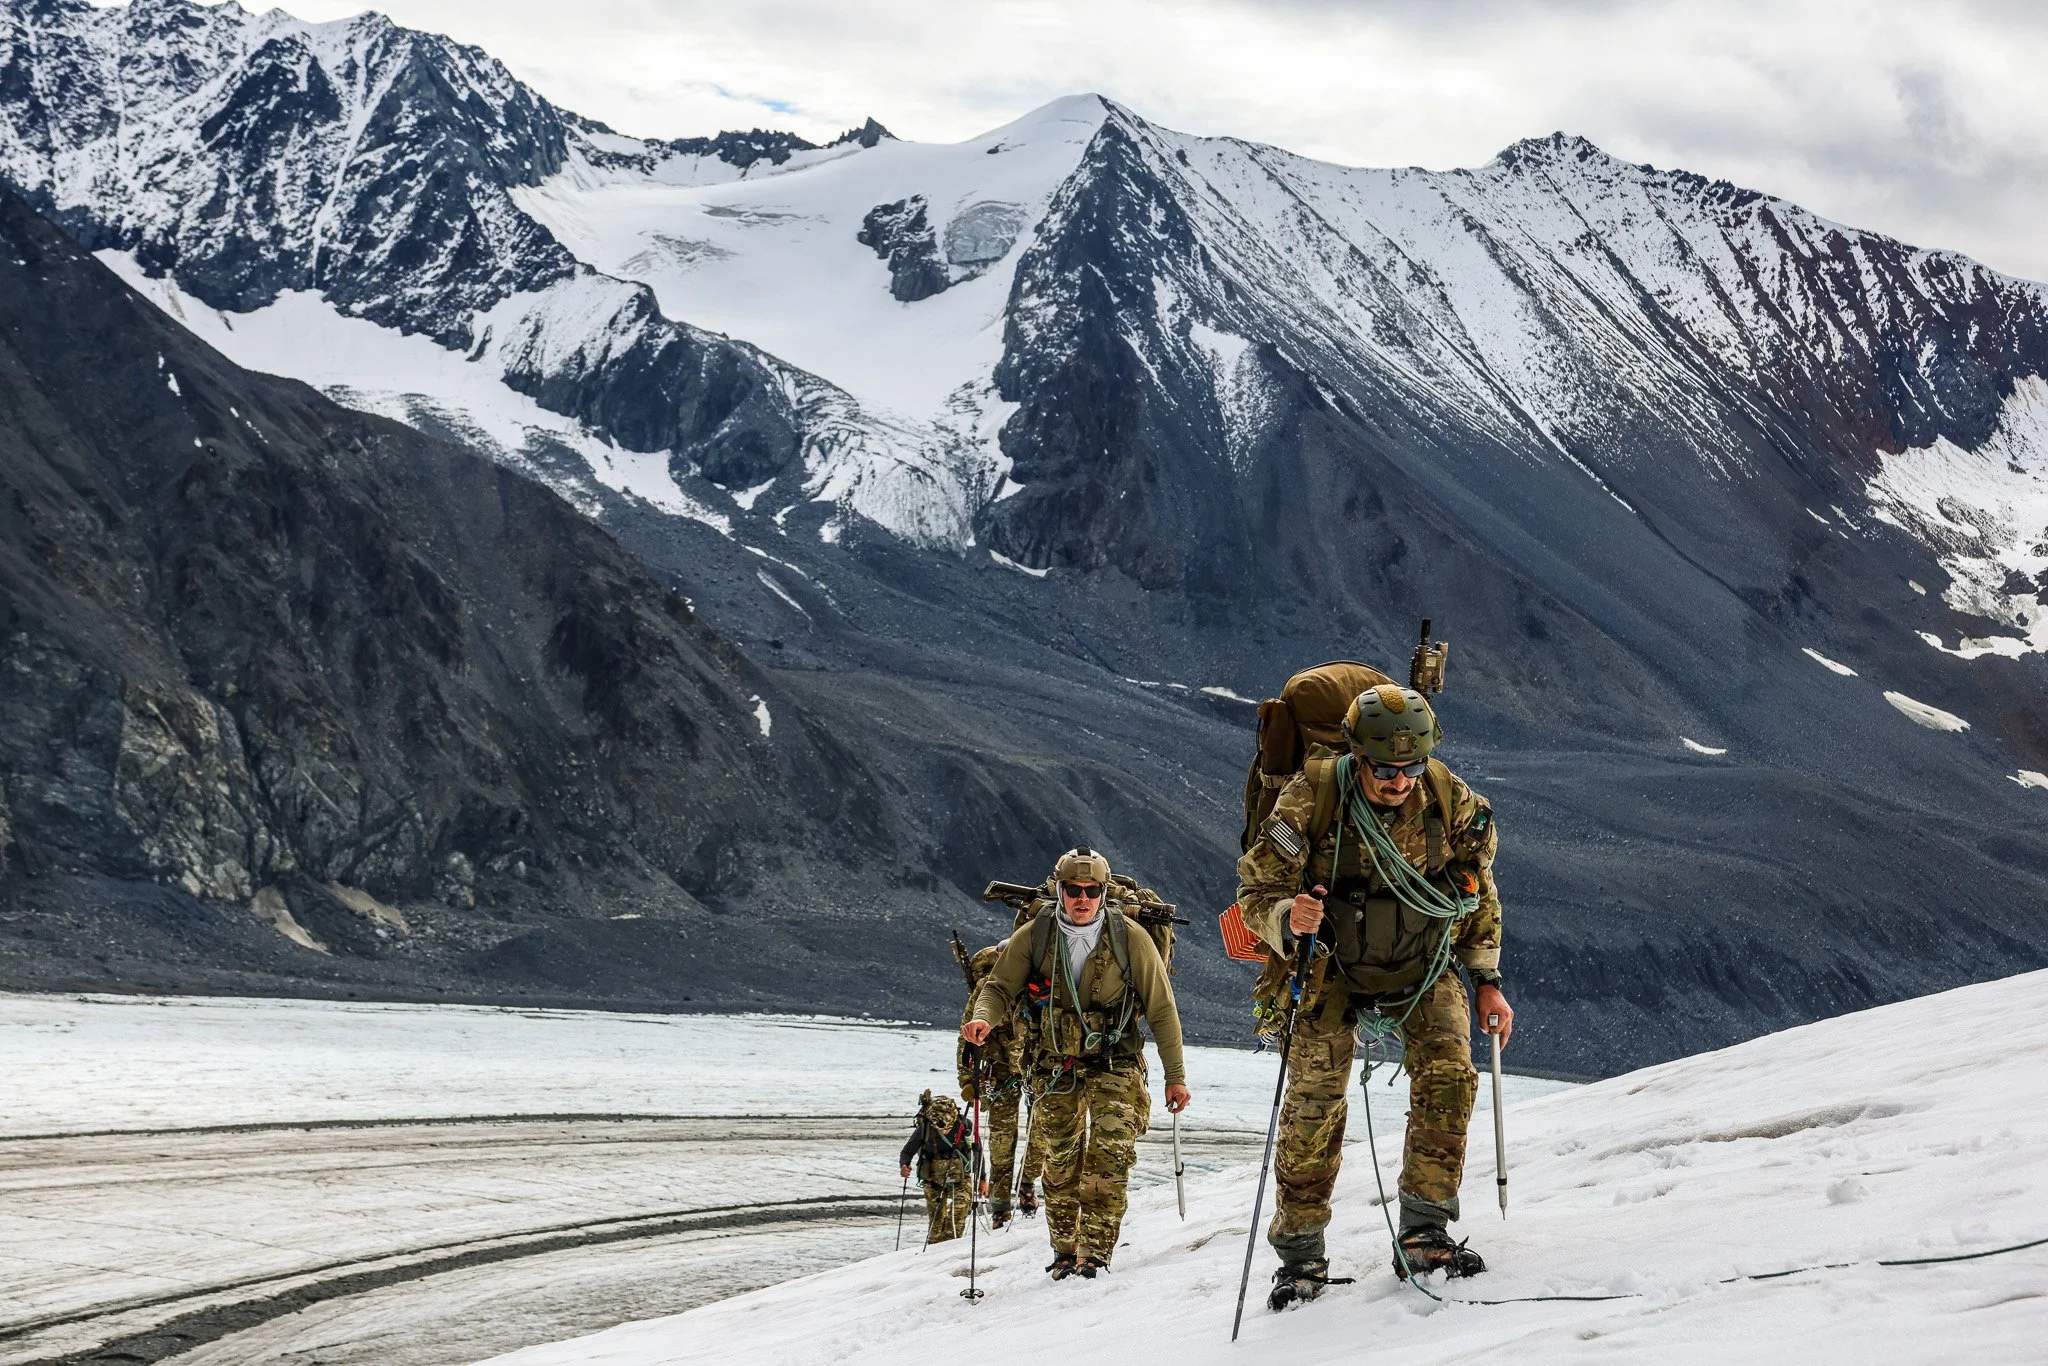
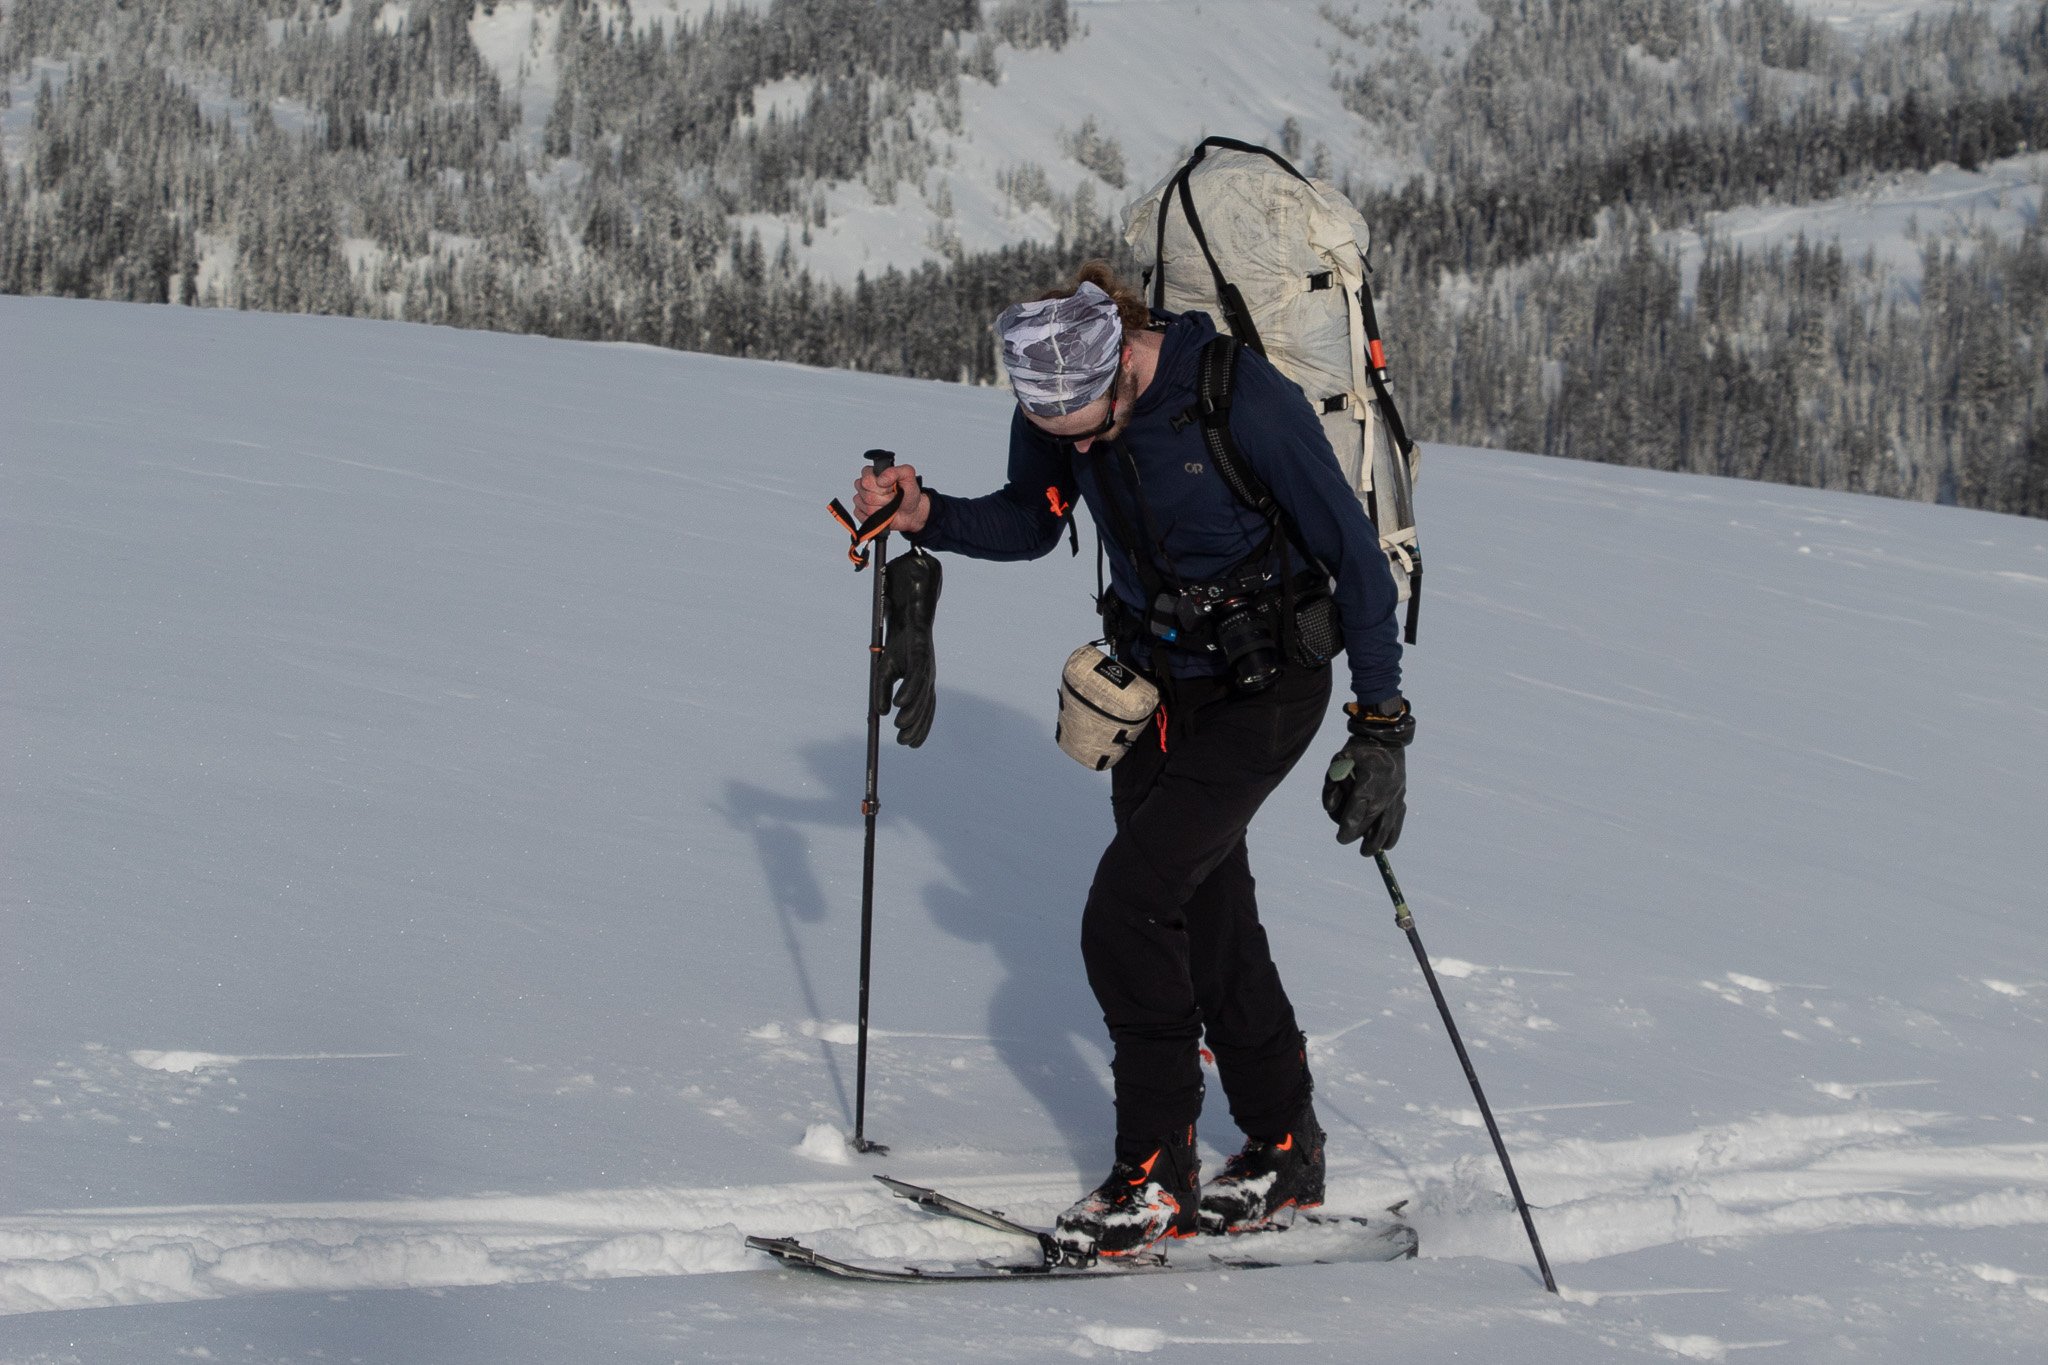
Quick access lets you get photos while trying to move quickly. Gulkana Glacier, Alaska.
Camera Options:
Camera Strap + Backpack: Stow it while climbing, take it out while you’re static, and secure with the camera strap around your neck. Put it back in the pack when you’re done. Having a pack with a drawstring closure, such as the Alpha FL 30 or Blitz 28, allows pretty quick access. Something like the Raide Research Pack or UD All Mountain has both easy top access and a back panel access zipper, which can be great for getting the camera out quickly.
Hyperlite Camera Pod: My go to is a combo of the Hyperlite Pod, a Blue Ice Alpine Runner, a backpack, and some cord attached directly to the camera. You can mount this like a chest strap on your backpack straps. It keeps your camera protected from the elements, but easily accessible. Using a backpack chest strap, you can secure it nice and tight if you’re running or moving quickly. Its great for 4th or easy 5th climbing, but I tend to put it inside the pack once it starts to get harder. It can be quite annoying when you’re pulling a bulge and can’t get your chest close to the wall.

If I am at a belay or hanging on a fixed line, I’ll put a Blue Ice Alpine Runner on as a neck strap, and use it like a normal camera strap. If I’m jugging up and down a fixed line, I’ll often just attach the case to my harness. I’ve taken off my normal camera neck strap, and instead used some cord and a carabiner I use to secure the camera directly. I’ve used the Hyperlite case in some pretty terrible weather and conditions, and it’s done a great job protecting the camera.
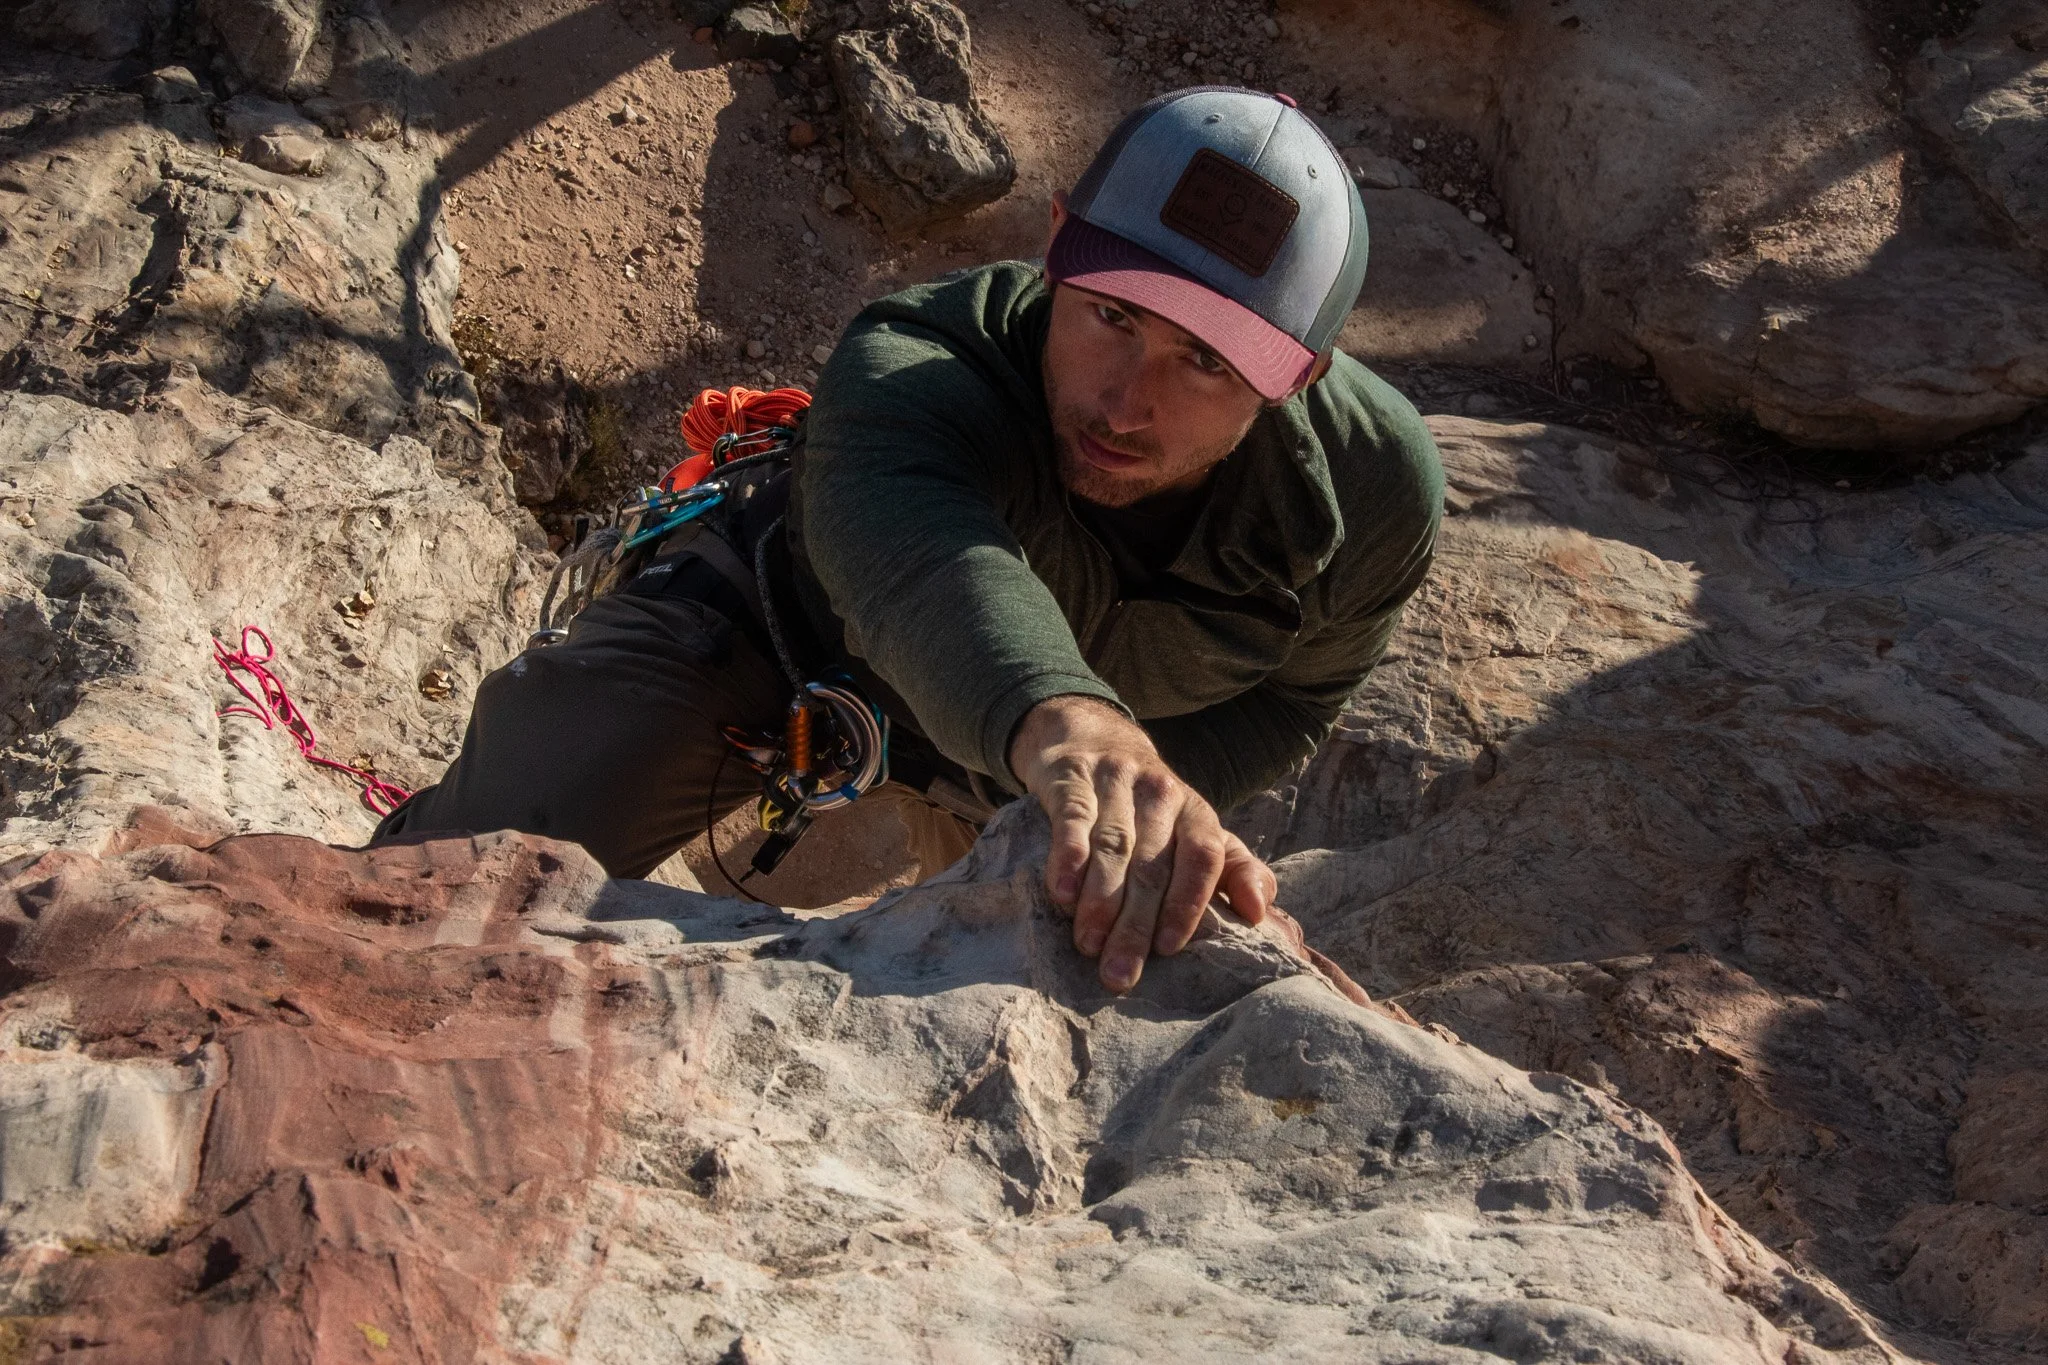
Hyperlite Pod in action. Here, Cody has his camera out ready for some photos, with the pod attached to his waist. No backpack rummaging required.
Peak Design Camera Clips: Pros-Instant Access. Cons-Exposure. This attachment is excellent for hiking in good weather, or for approaches. It allows for the quickest access, unclipping from your pack shoulder strap. However, it flops around if you’re moving very quickly, is worse the larger camera/lens you have, and leaves the camera exposed to the elements. The last thing I want is going to make a move and having my lens bang against the rock. These have a place, and can fit into the above systems well. But if it is your primary means of attachment, your camera might take some damage. I would combine with a tether directly to the camera so you don’t have to worry about dropping it while it is unclipped.
Tip 2: Get in Position
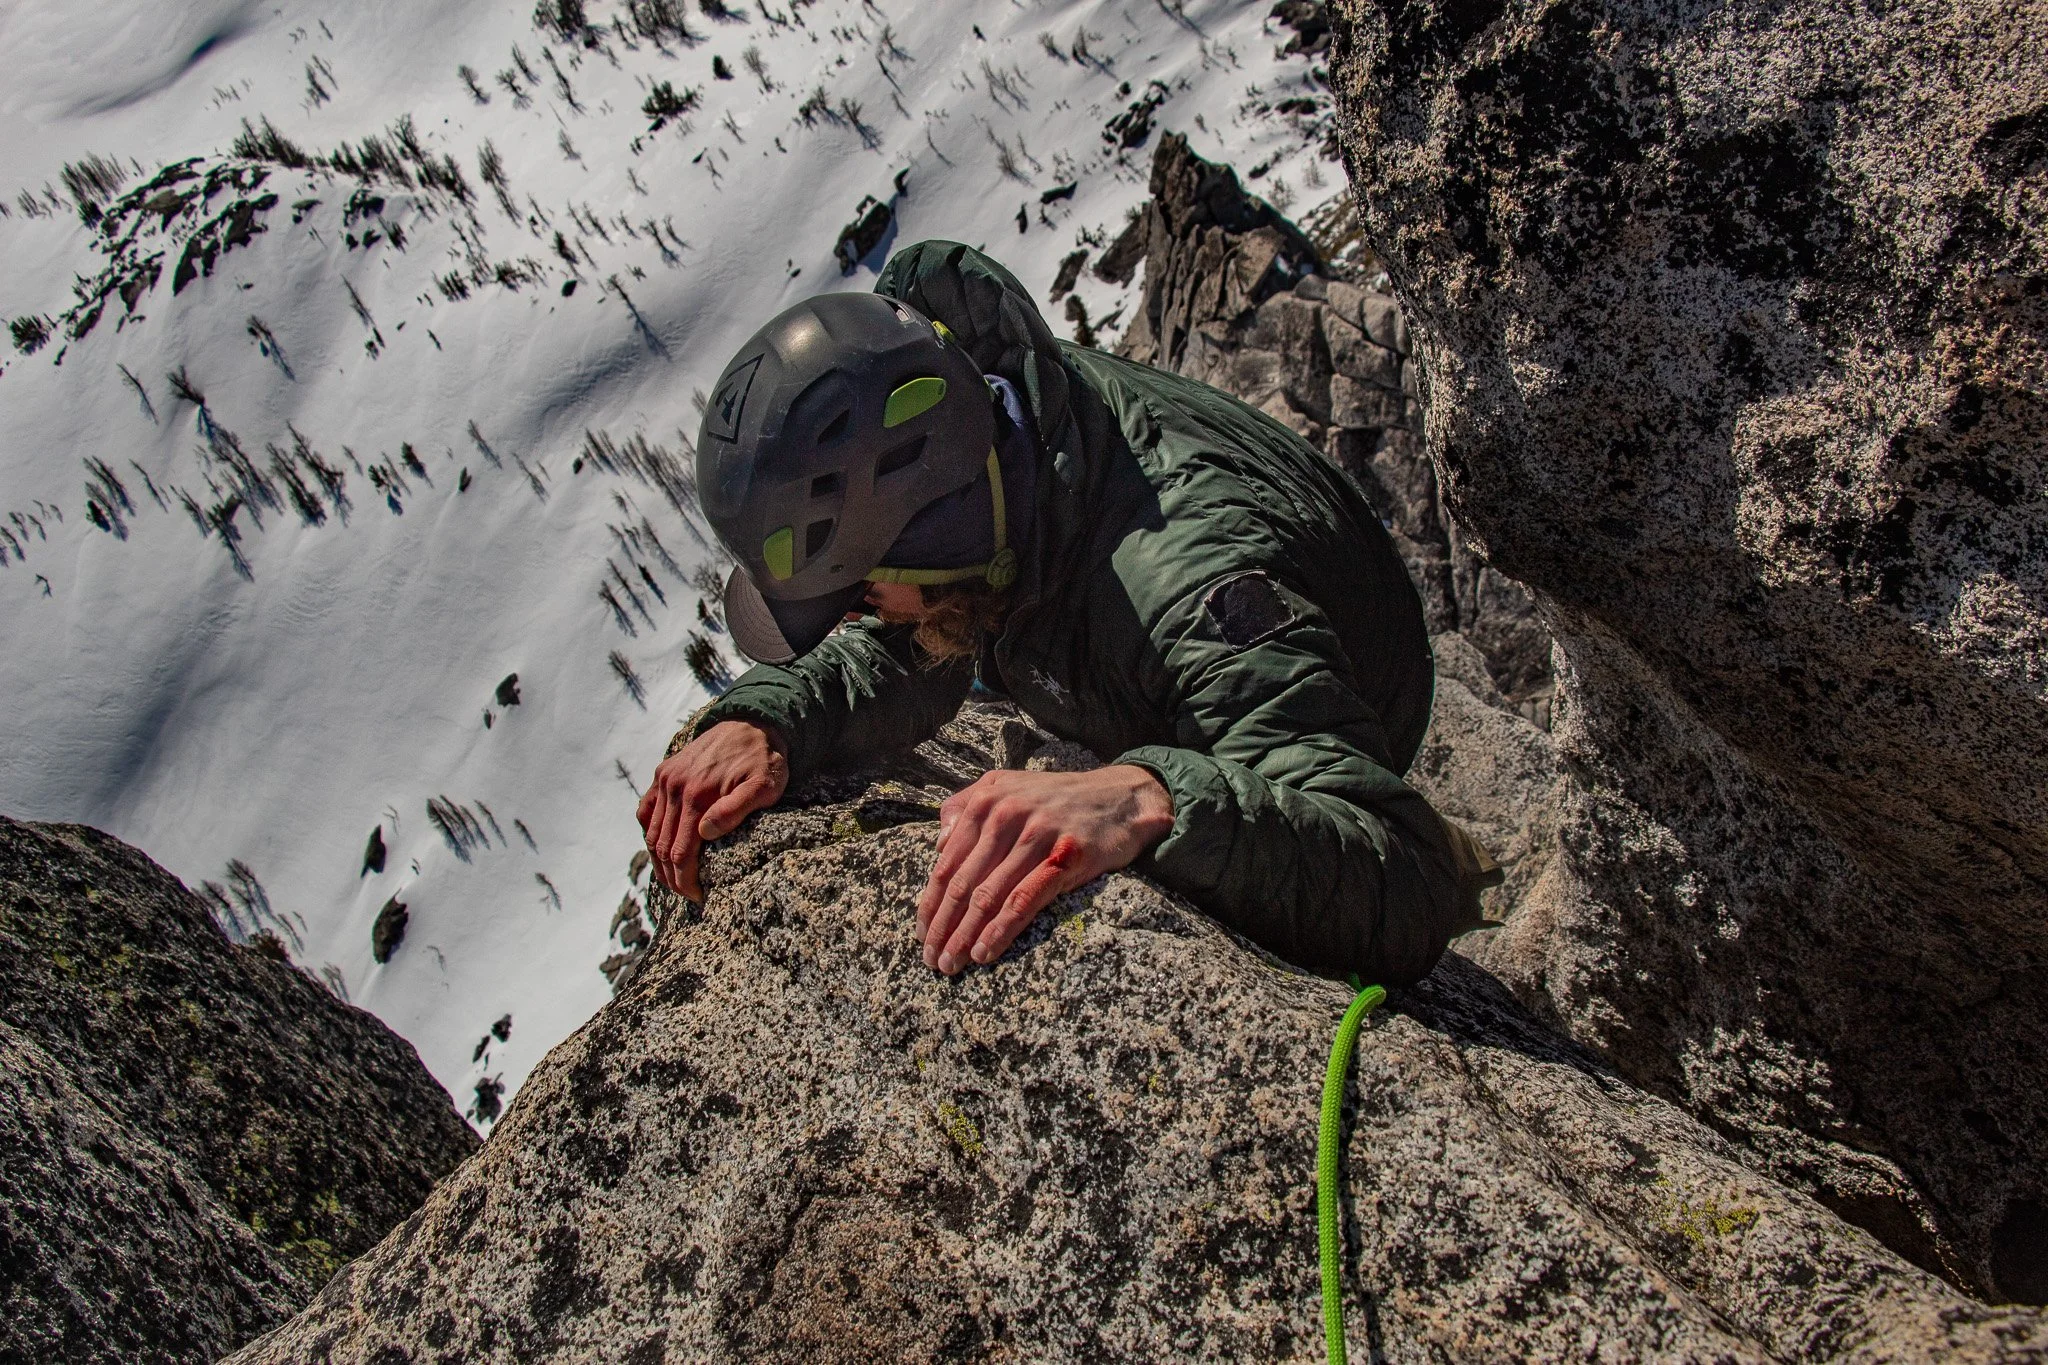
Extending out my masterpoint from my anchor, not only was I able to view my follower, but capture the bloody knuckles, patched down jacket, and snow slopes below. Topping out on an early season ascent of Prusik Peak.
Once you have your camera secure and accessible, you need to get it in a position to get the shot. There are a lot of ways to do this, depending on route and number of people in the party. One thing that is often helpful is to be able to extend yourself away from the anchor. If you can’t see the climber, you can’t get a photo.
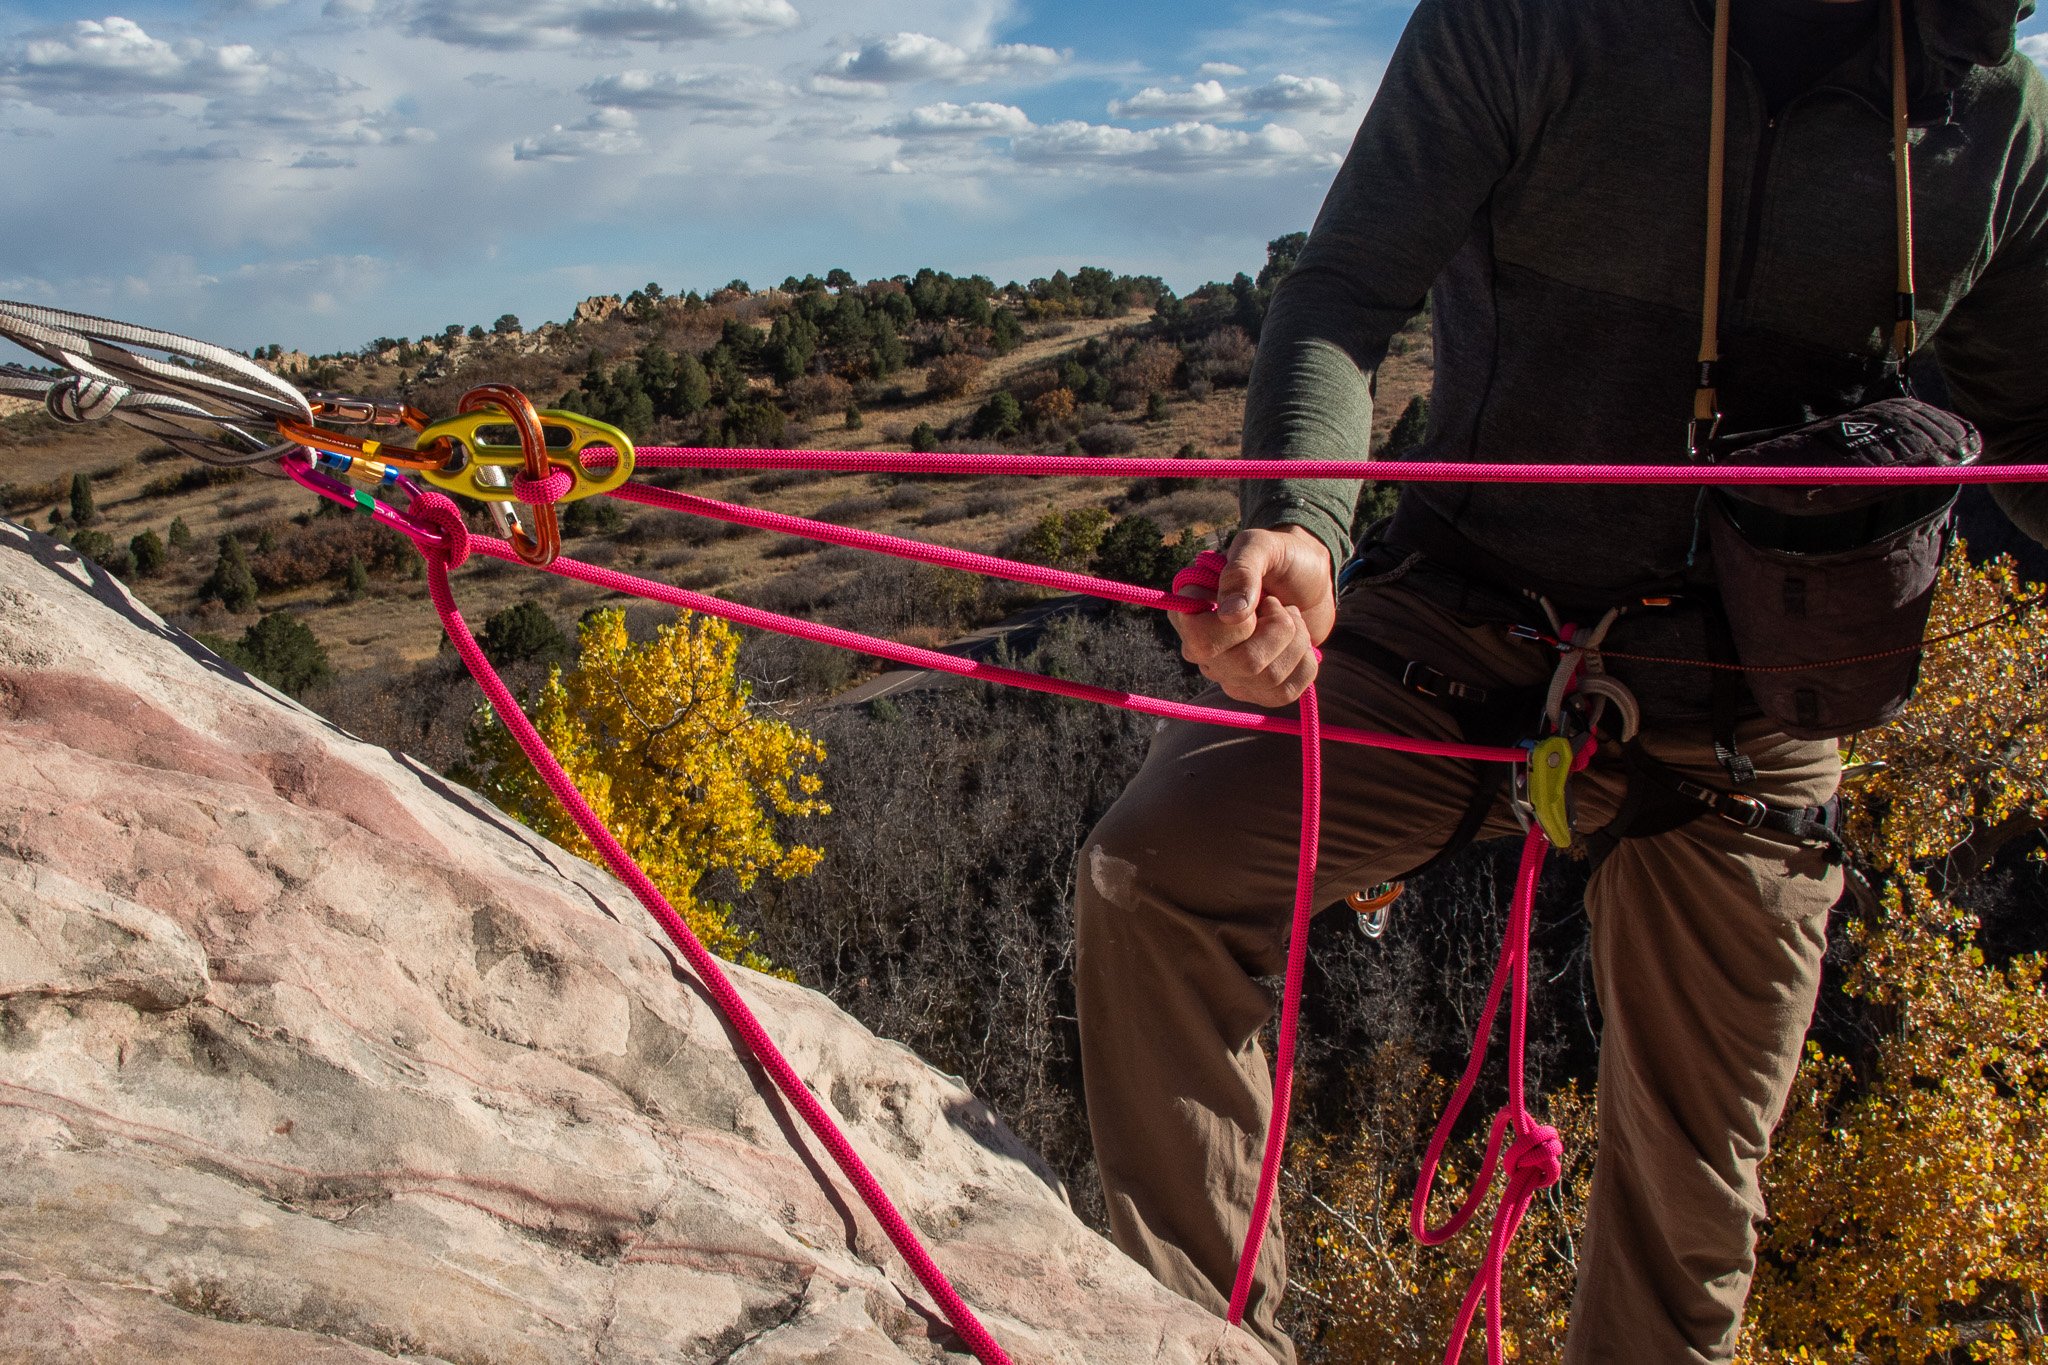
1: Extending away from the anchor
Clove hitch into the anchor, but give yourself a good deal of slack. Then, put on a GriGri or Pinch, and you can lower yourself down to where you have good visibility of your climber. Using your GriGri to belay your follower? Put a locker on your belay loop, and use a Munter/Munter Mule instead. Having a long adjustable tether to the anchor will allow for a lot more opportunity to capture quality photos.
2: Use a fixed line
Using a fixed line adjacent to the climbers is a great way to capture various angles and not be in the way. Be familiar with descending and ascending a rope, and have your techniques dialed. Learning how to place a fixed line, especially on multipitch routes, also takes some knowledge to do safely. Once you have this down, you’ll be able to get yourself to the right place at the right time. Plenty of resources from online articles and books are written on how best to do this. Hiring a guide or taking a course will prevent you form making a catastrophic mistake if new to these skills. A few ways are listed HERE.
3: Hike around.
Sometimes the simplest solution is the best. Several climbs can be viewed from ridges, nearby hills, or a simple scramble to gain higher ground. Often times this offers great opportunities to tell the story of a climb, with no rope work needed.
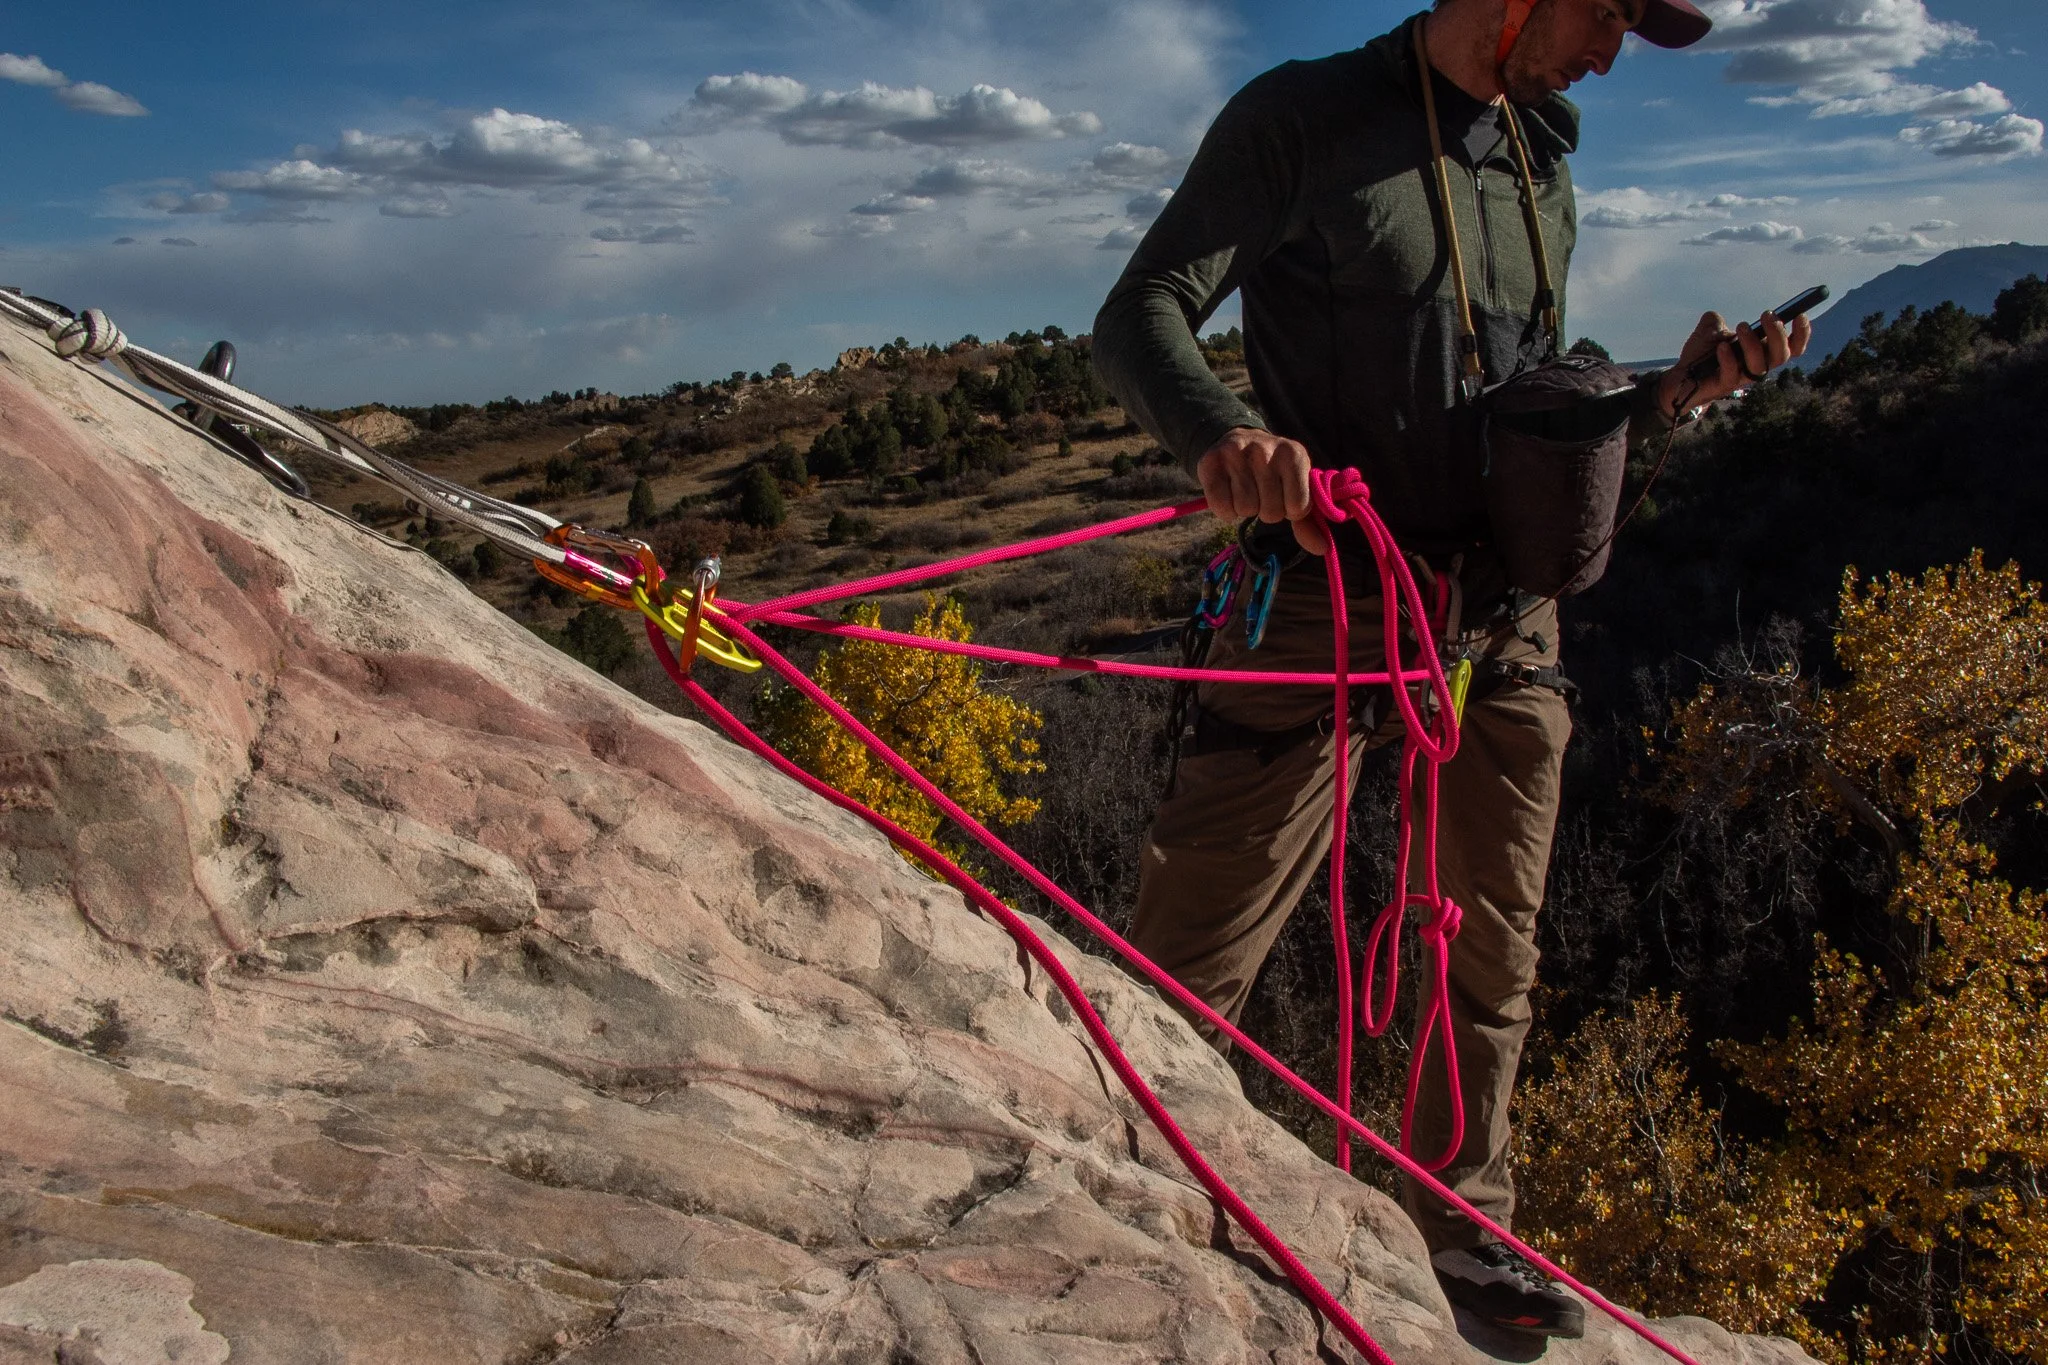
4: Pre-Position and Wireless
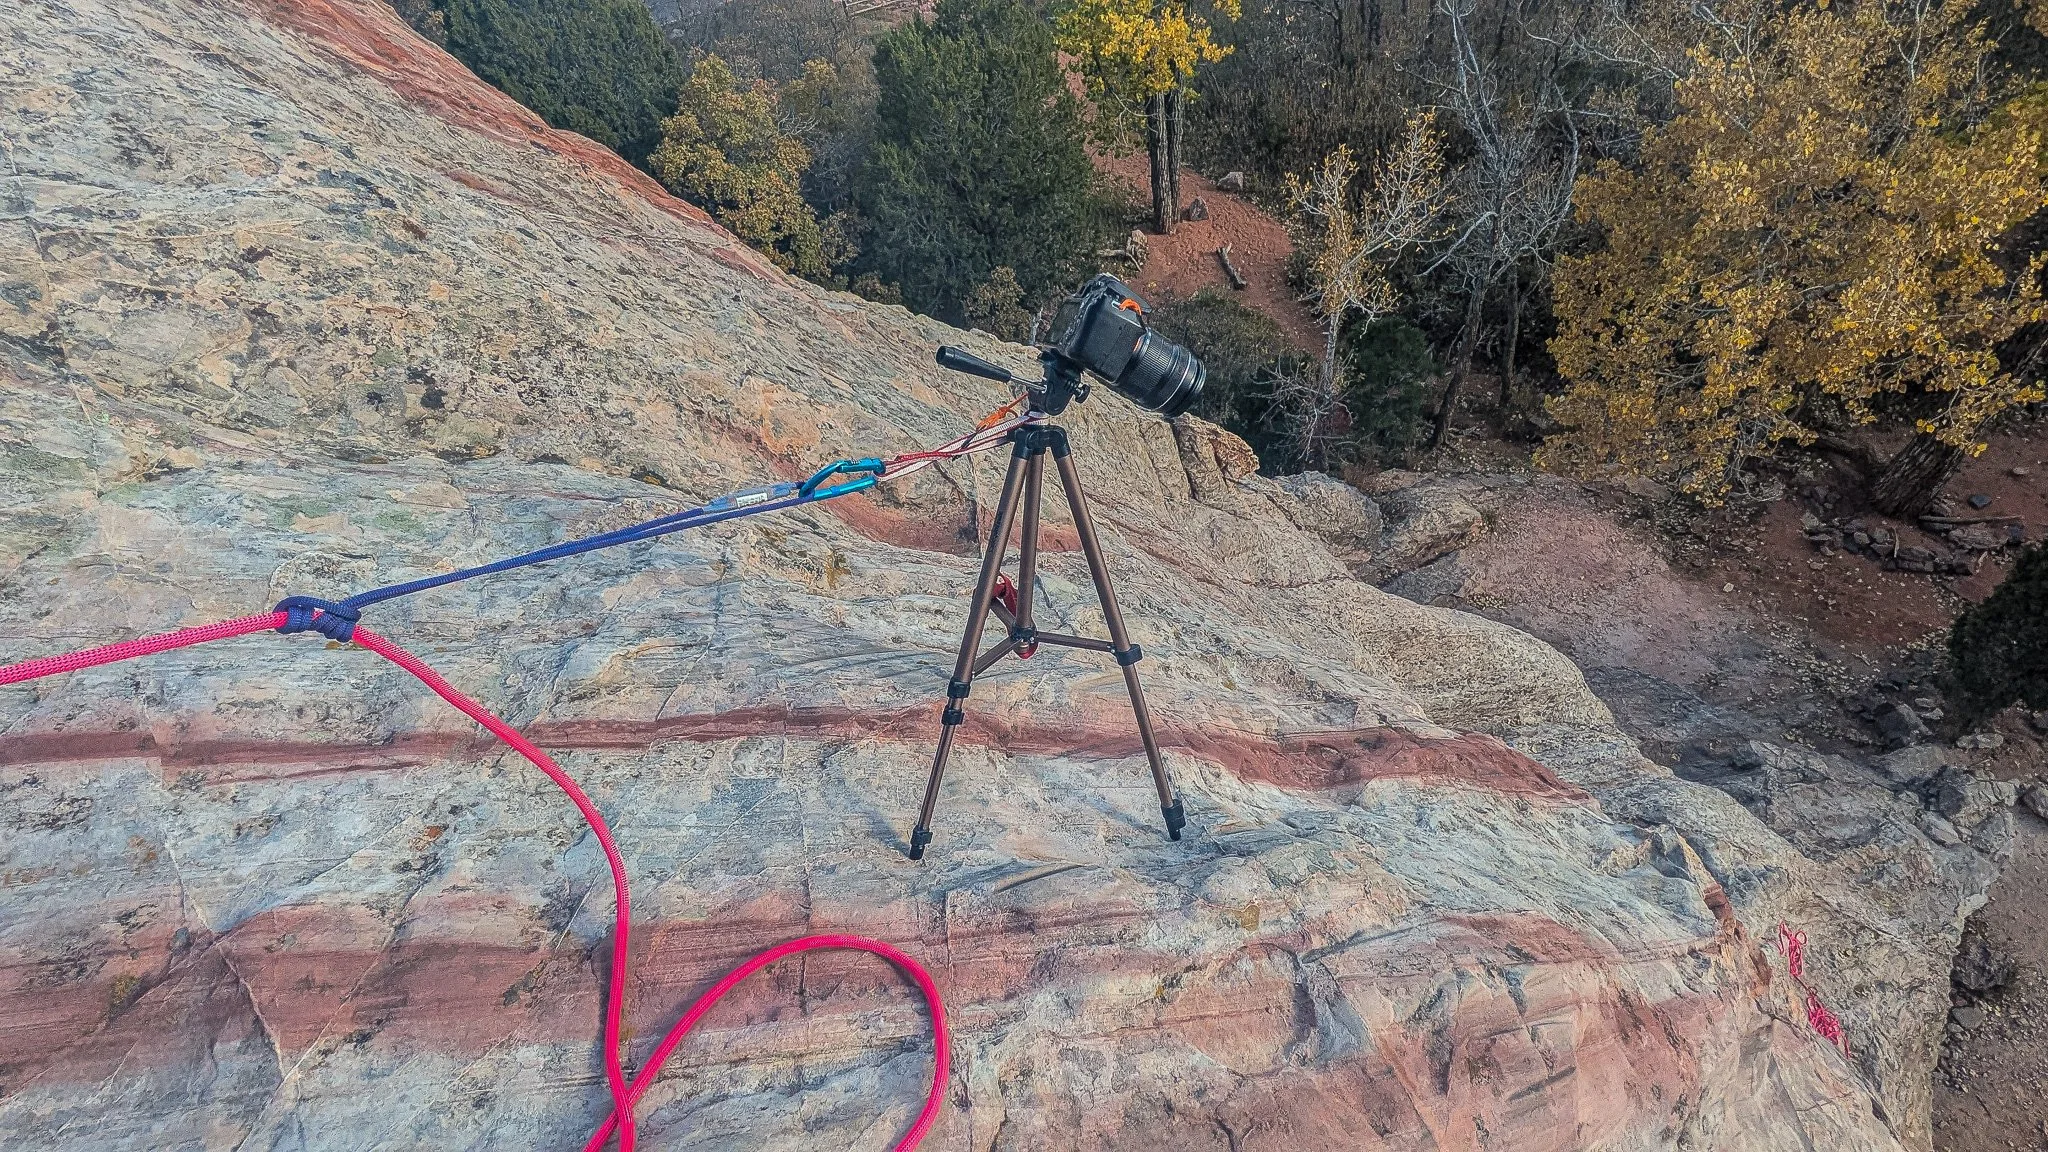
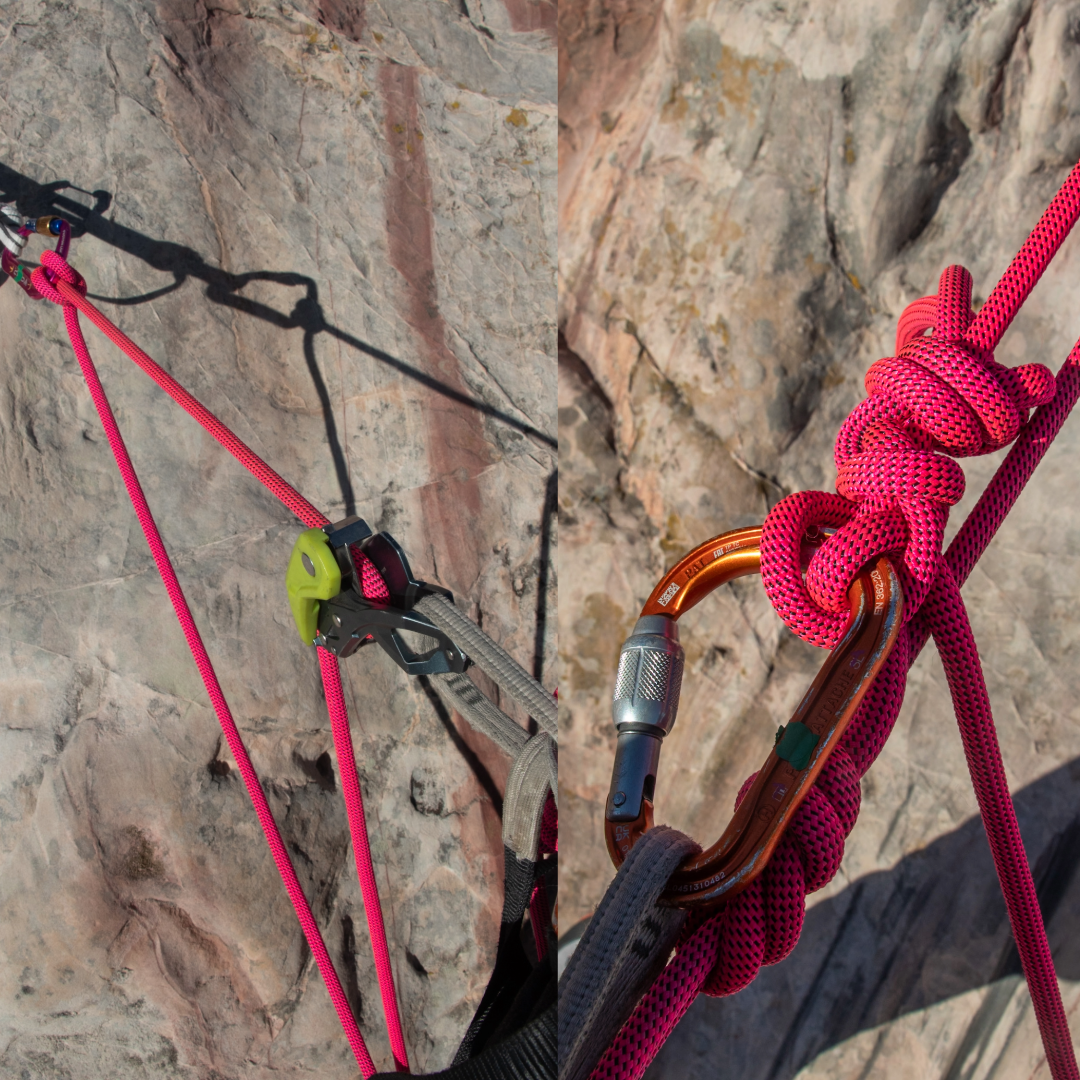
This feeds into the next topic, “Go Hands Free”. Not only do you not have to be where the camera is, but you don’t have to be pressing the shutter. Most cameras now can connect to your phone, or have some sort of continuous shooting or time lapse mode. Setting up a camera for a shot and not having to be there is a great way to capture photos while still enjoying the climbing. Here, I have a tripod mounted camera, set in place with an adjustable friction hitch to the rope.
Using a wireless connection can be great to get some Top Rope Solo shots. Myself, making this 5.4 look as gnarly as possible.
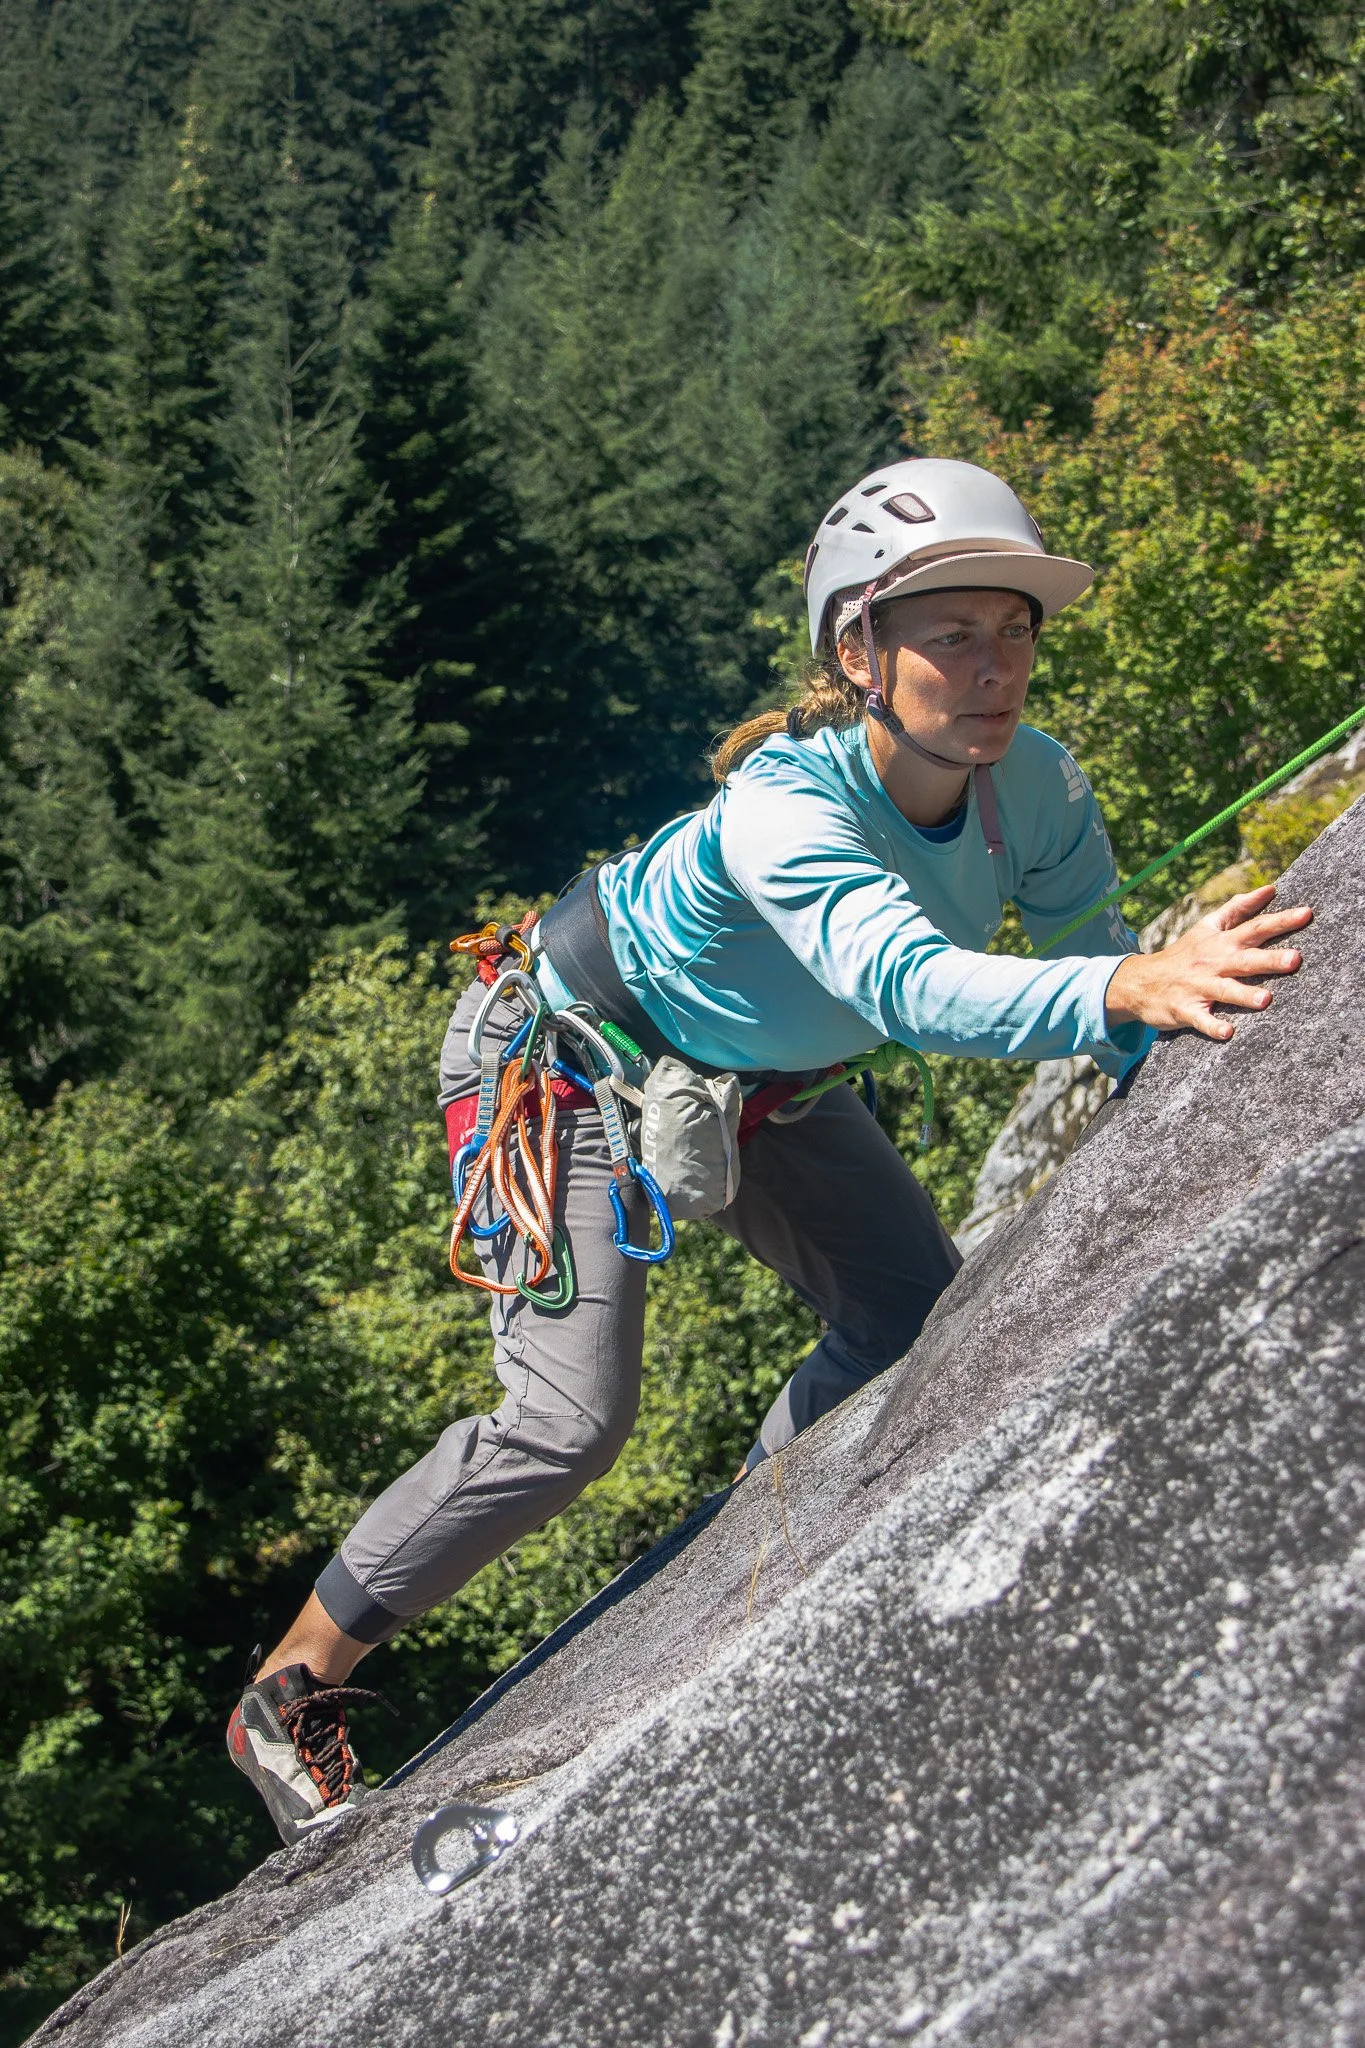
Tip 3: Go Hands Free
To take photos, you generally need at least one hand free(unless using a wireless connection/time lapse, as mentioned above). Your belay device can make a big difference. If belaying from above while taking photos, GriGri’s, a Pinch, or a Kong GiGi feed much smoother and are easier to pull rope through one handed then a typical ATC. I prefer plaquette style devices when taking photos, as I don’t have to worry about the rope sliding through the device under its own weight(Petzl’s article about this HERE). The Kong GiGi is the best of both worlds, providing a high level of security but still allows the rope to be pulled through smoothly.
Here, taking a quick photo, I make a few wraps around my hand. This allows me to pull through rope easily while maintaining the break strand and keeping slack from building up as my follower climbs. With the other hand, I am able to take photos. I can even bring the hand with the wraps up to my camera if I need both hands to take a photo. This technique works well if your follower is climbing quickly.
Here, I have tied an overhand knot in the break strand, allowing me to drop the break strand and use both hands to capture a great photo. I can reach down, take in slack easily as my follower moves up, and continue to take photos. Generally, you don’t want the knot further than 1 meter from the belay device in case it fails to catch. I generally don’t use this method with a GriGri, as the weight of the rope can cause it to slip through all the way to the knot, giving the climber unnecessary slack. This method works great to get photos of your follower on harder climbing where they are moving slower. If on easier terrain, it is much harder to constantly tie/un-tie knots quickly.
As mentioned above, a pre-placed camera on a tripod with a wireless connection allows you to go hands free with the camera. You can get shots of the climb without interfering with the belaying and climbing process.
Tip 4: Composition to Tell the Story
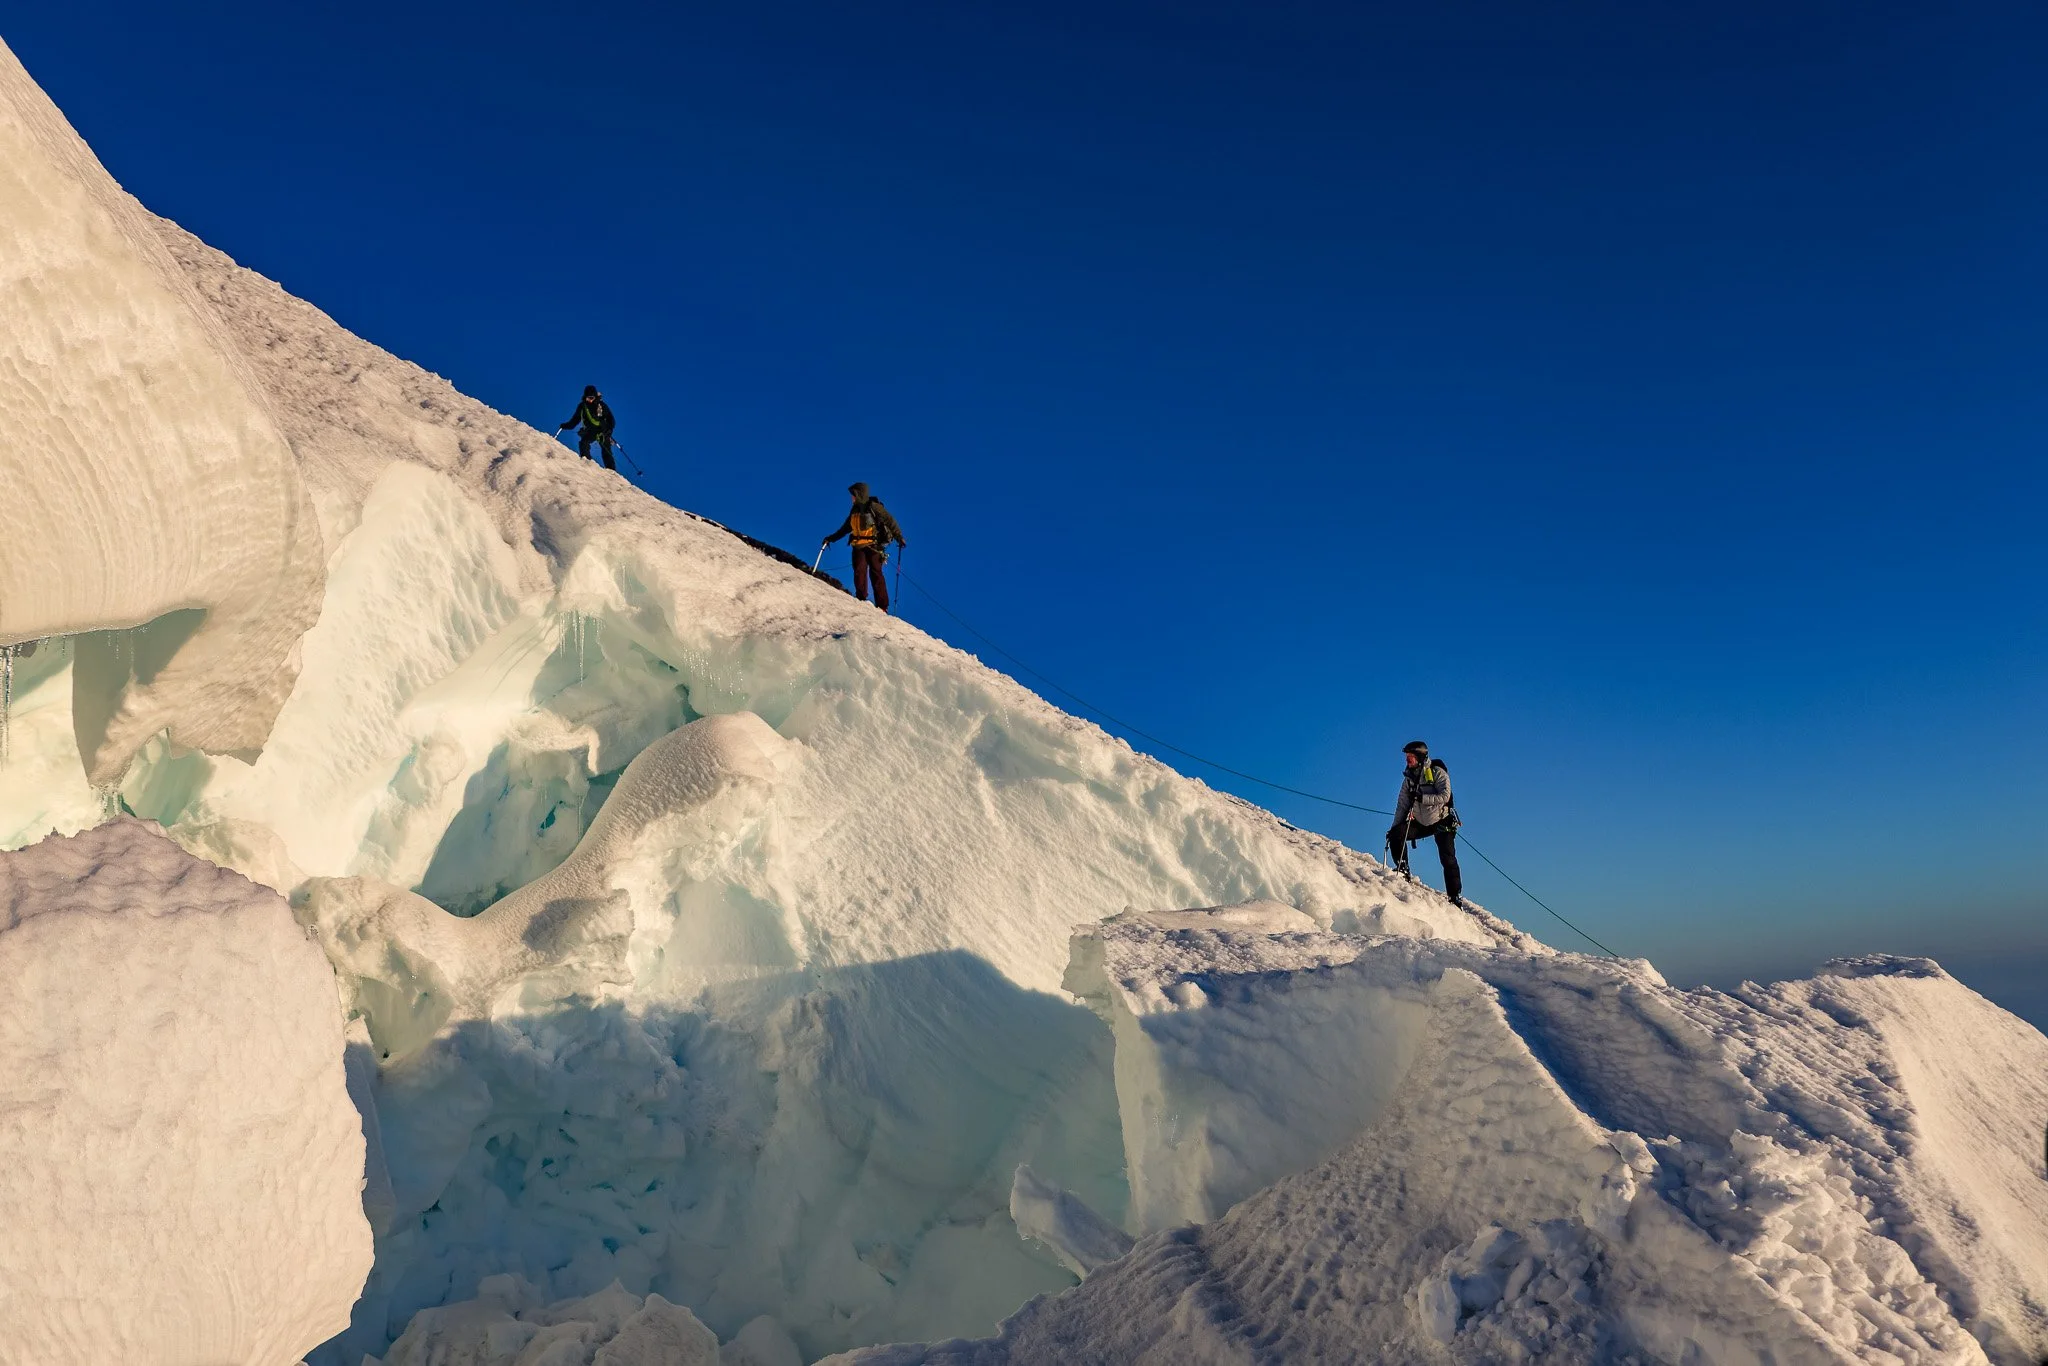
Crevasse Crossing. Emmons Glacier, Mt. Rainier.
Now that you’ve gotten into position and are ready to take the photo, the next step is composing your frame. This can take a good photo to a great one. It’s also where your personal creativity can shine. Using composition is how you tell the story you want to tell. Do you want to highlight the crux, a tiny crimp that you have to pull? Then focus on the fingers front and center, gripping hard. Is there a difficult, grungy chimney? Have the climber smaller in the frame, making it look like the rock is swallowing them whole. Try different compositions, and have fun with it! The more you practice, the more you’ll see what works and what doesn’t. At the end of the day, it’s the story you’re trying to tell, so think about how to tell that with an image.
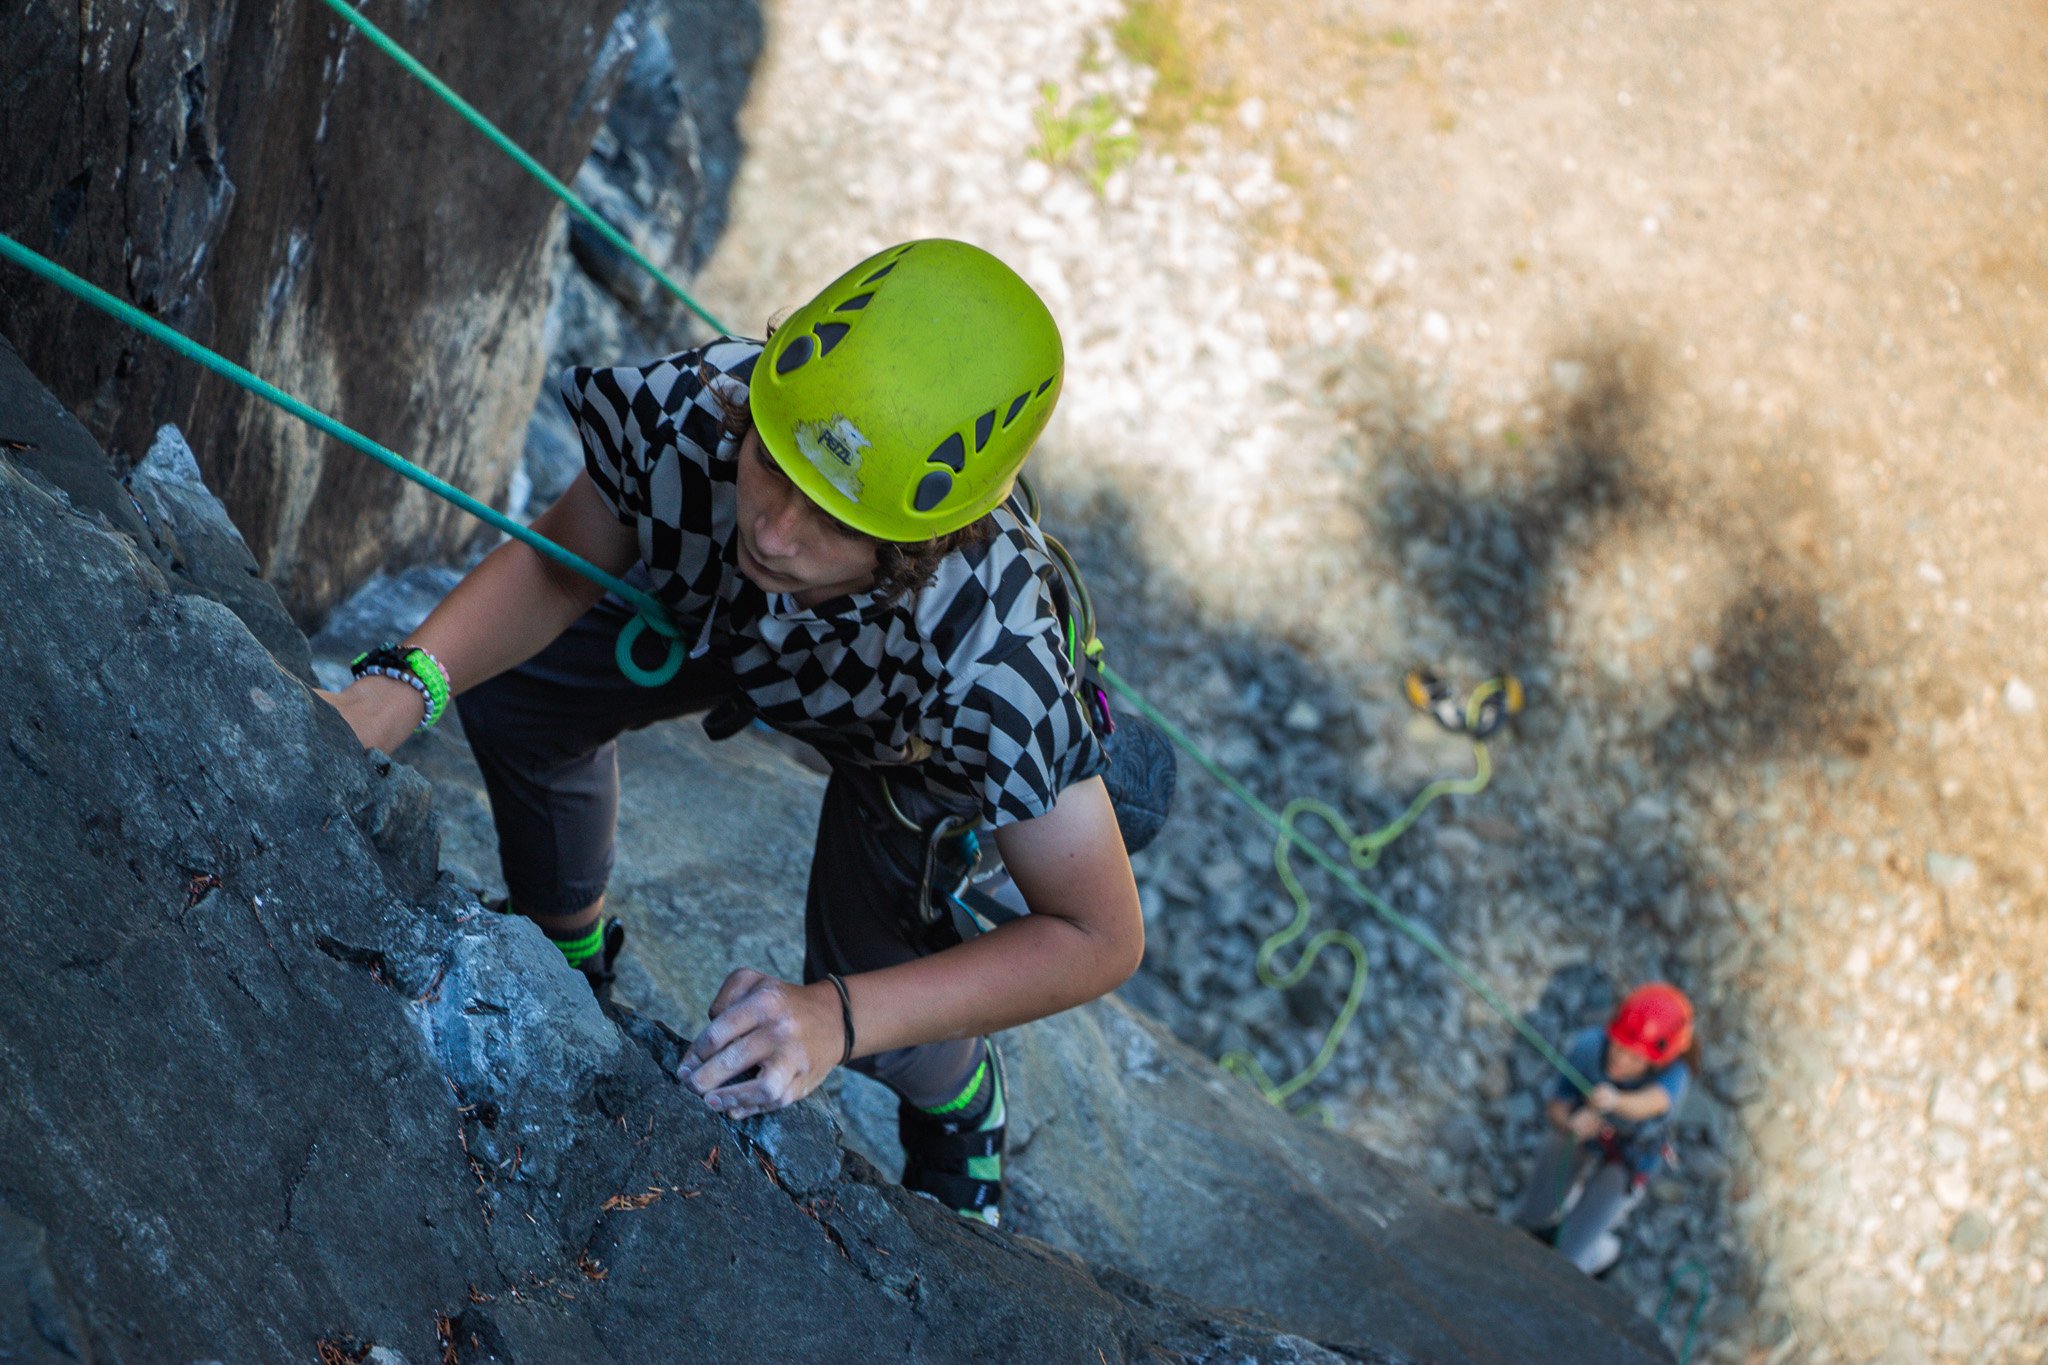
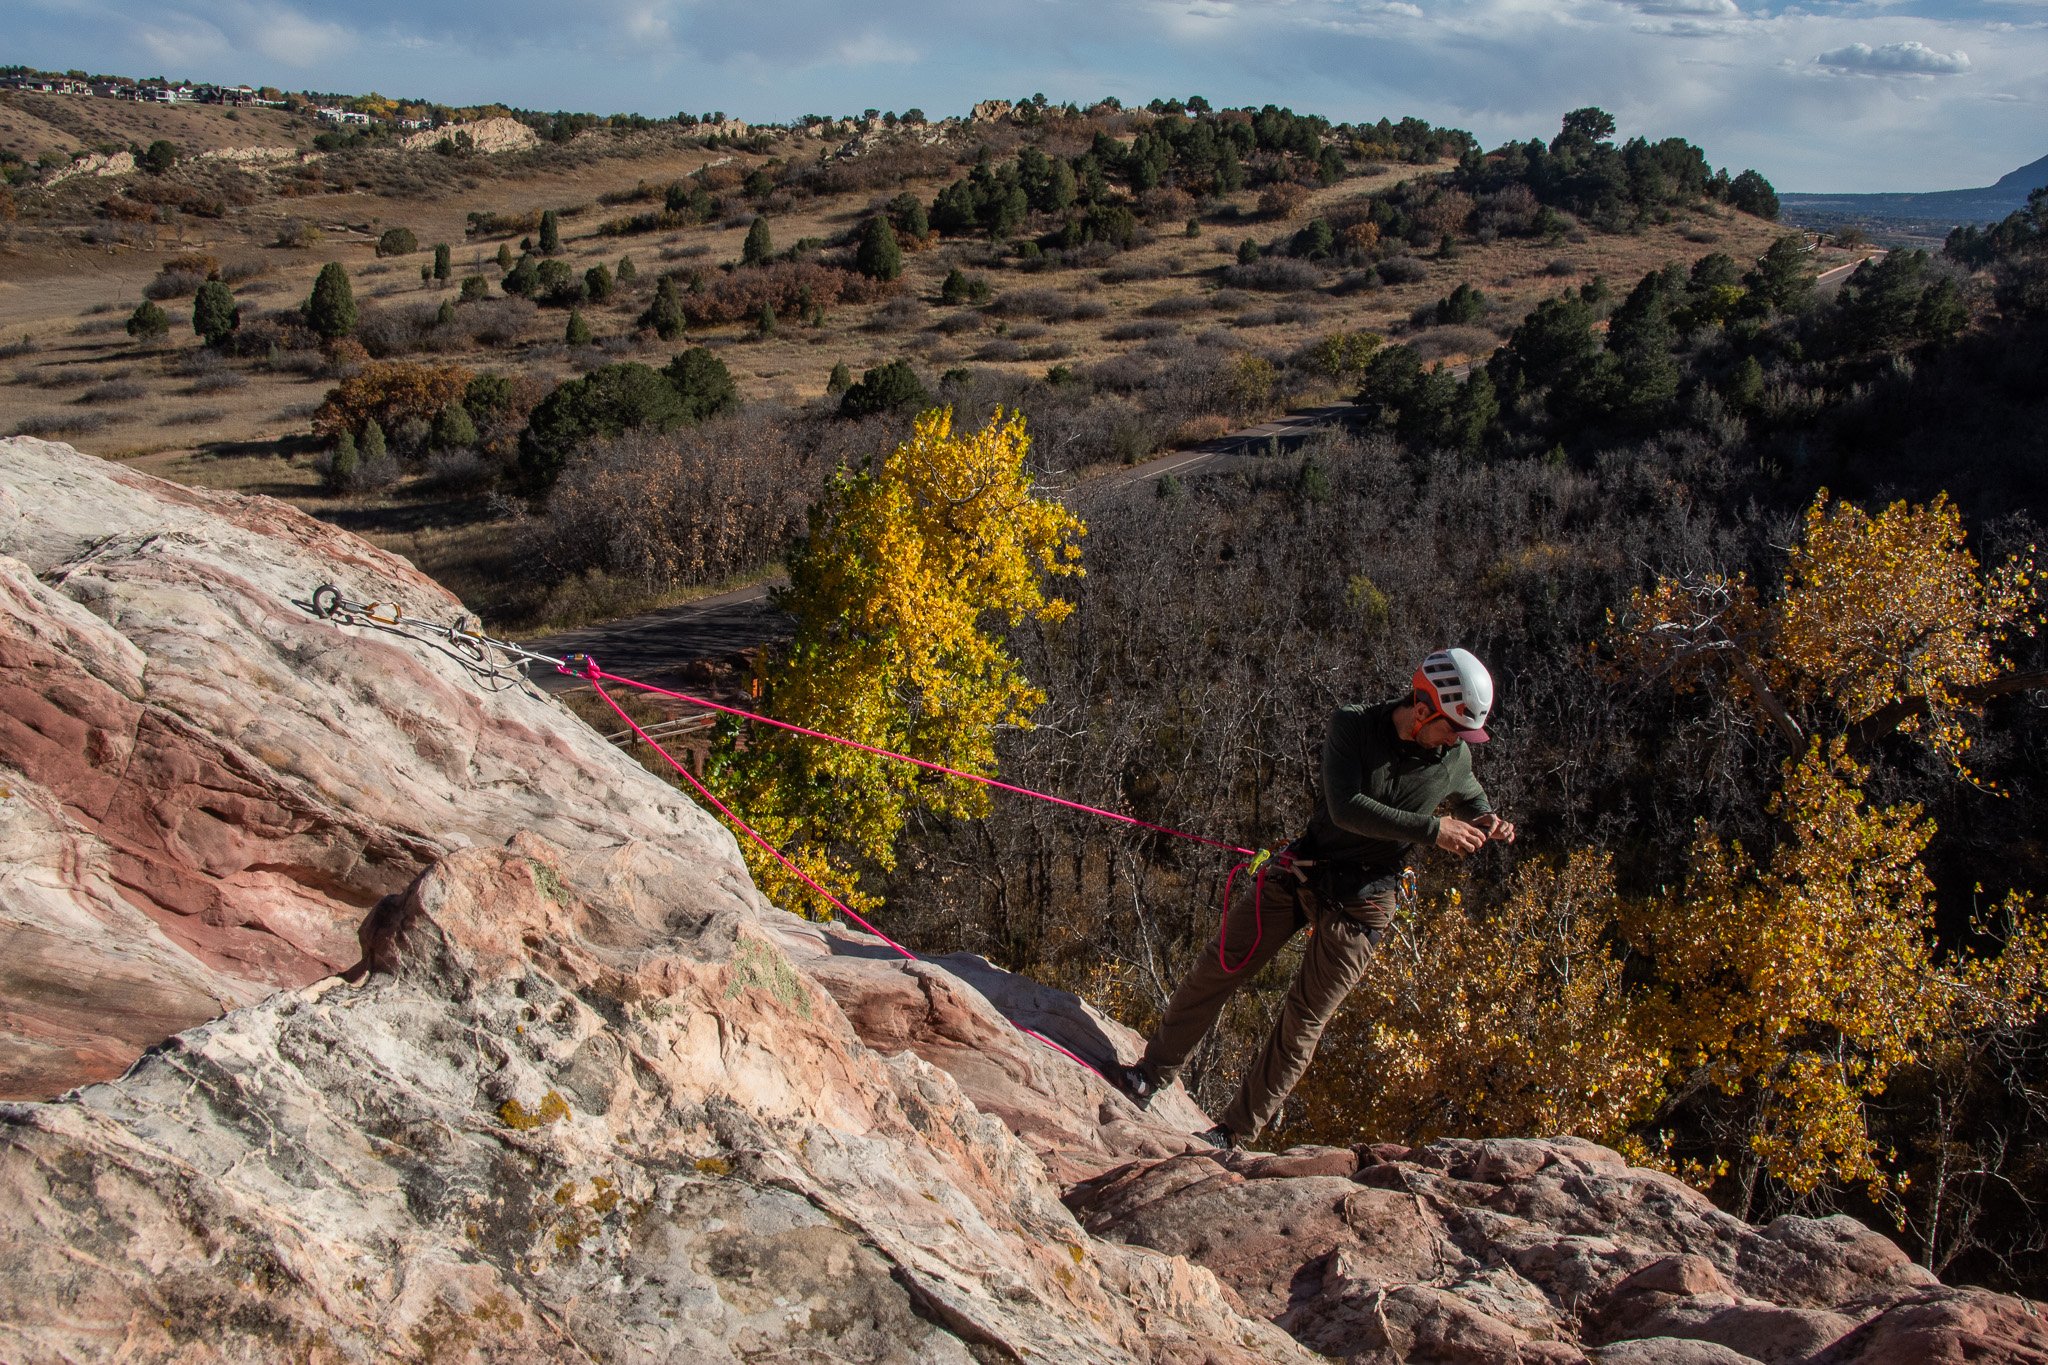
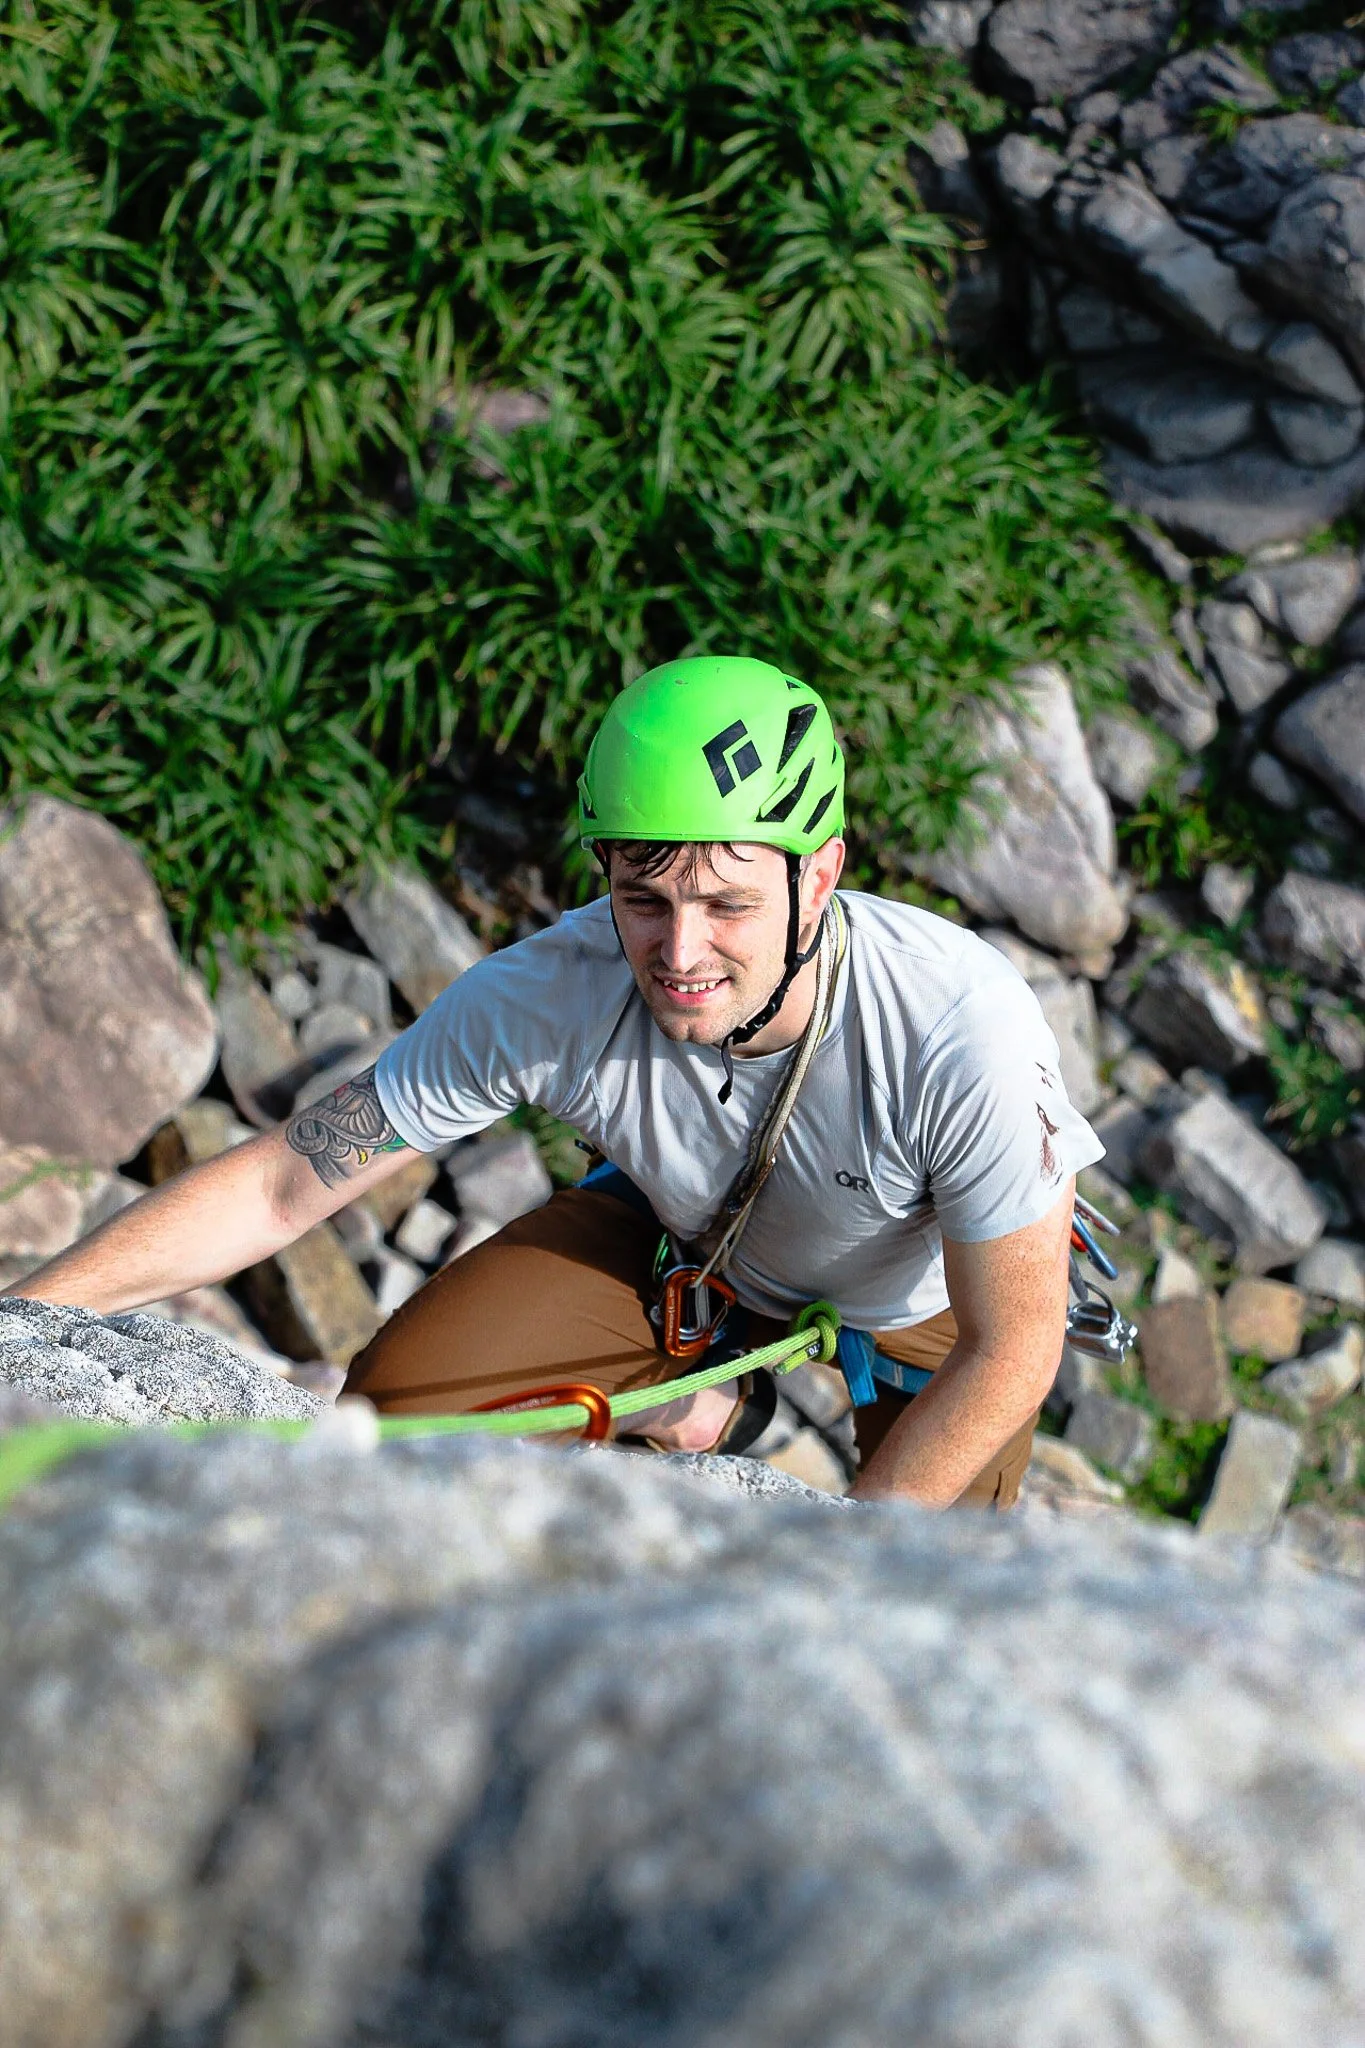
Be familiar with the Rule of Thirds, and when or why you may break it. Here, the subject is moving left, so would typically be on the right 1/3. However, he is placed on the left to include the belayer and ground. Combined with a lower aperture, this gives a sense of depth and scale to the climb.
Good climbing photos don’t always have to have someone climbing, either. It could be of the climber who realized they tied in their figure 8 wrong during a safety check. Or someone armed with several Big Purps, getting ready to conquer a wide climb. Photos of before and after a climb can tell a lot about the experience without ever showing the climb itself.
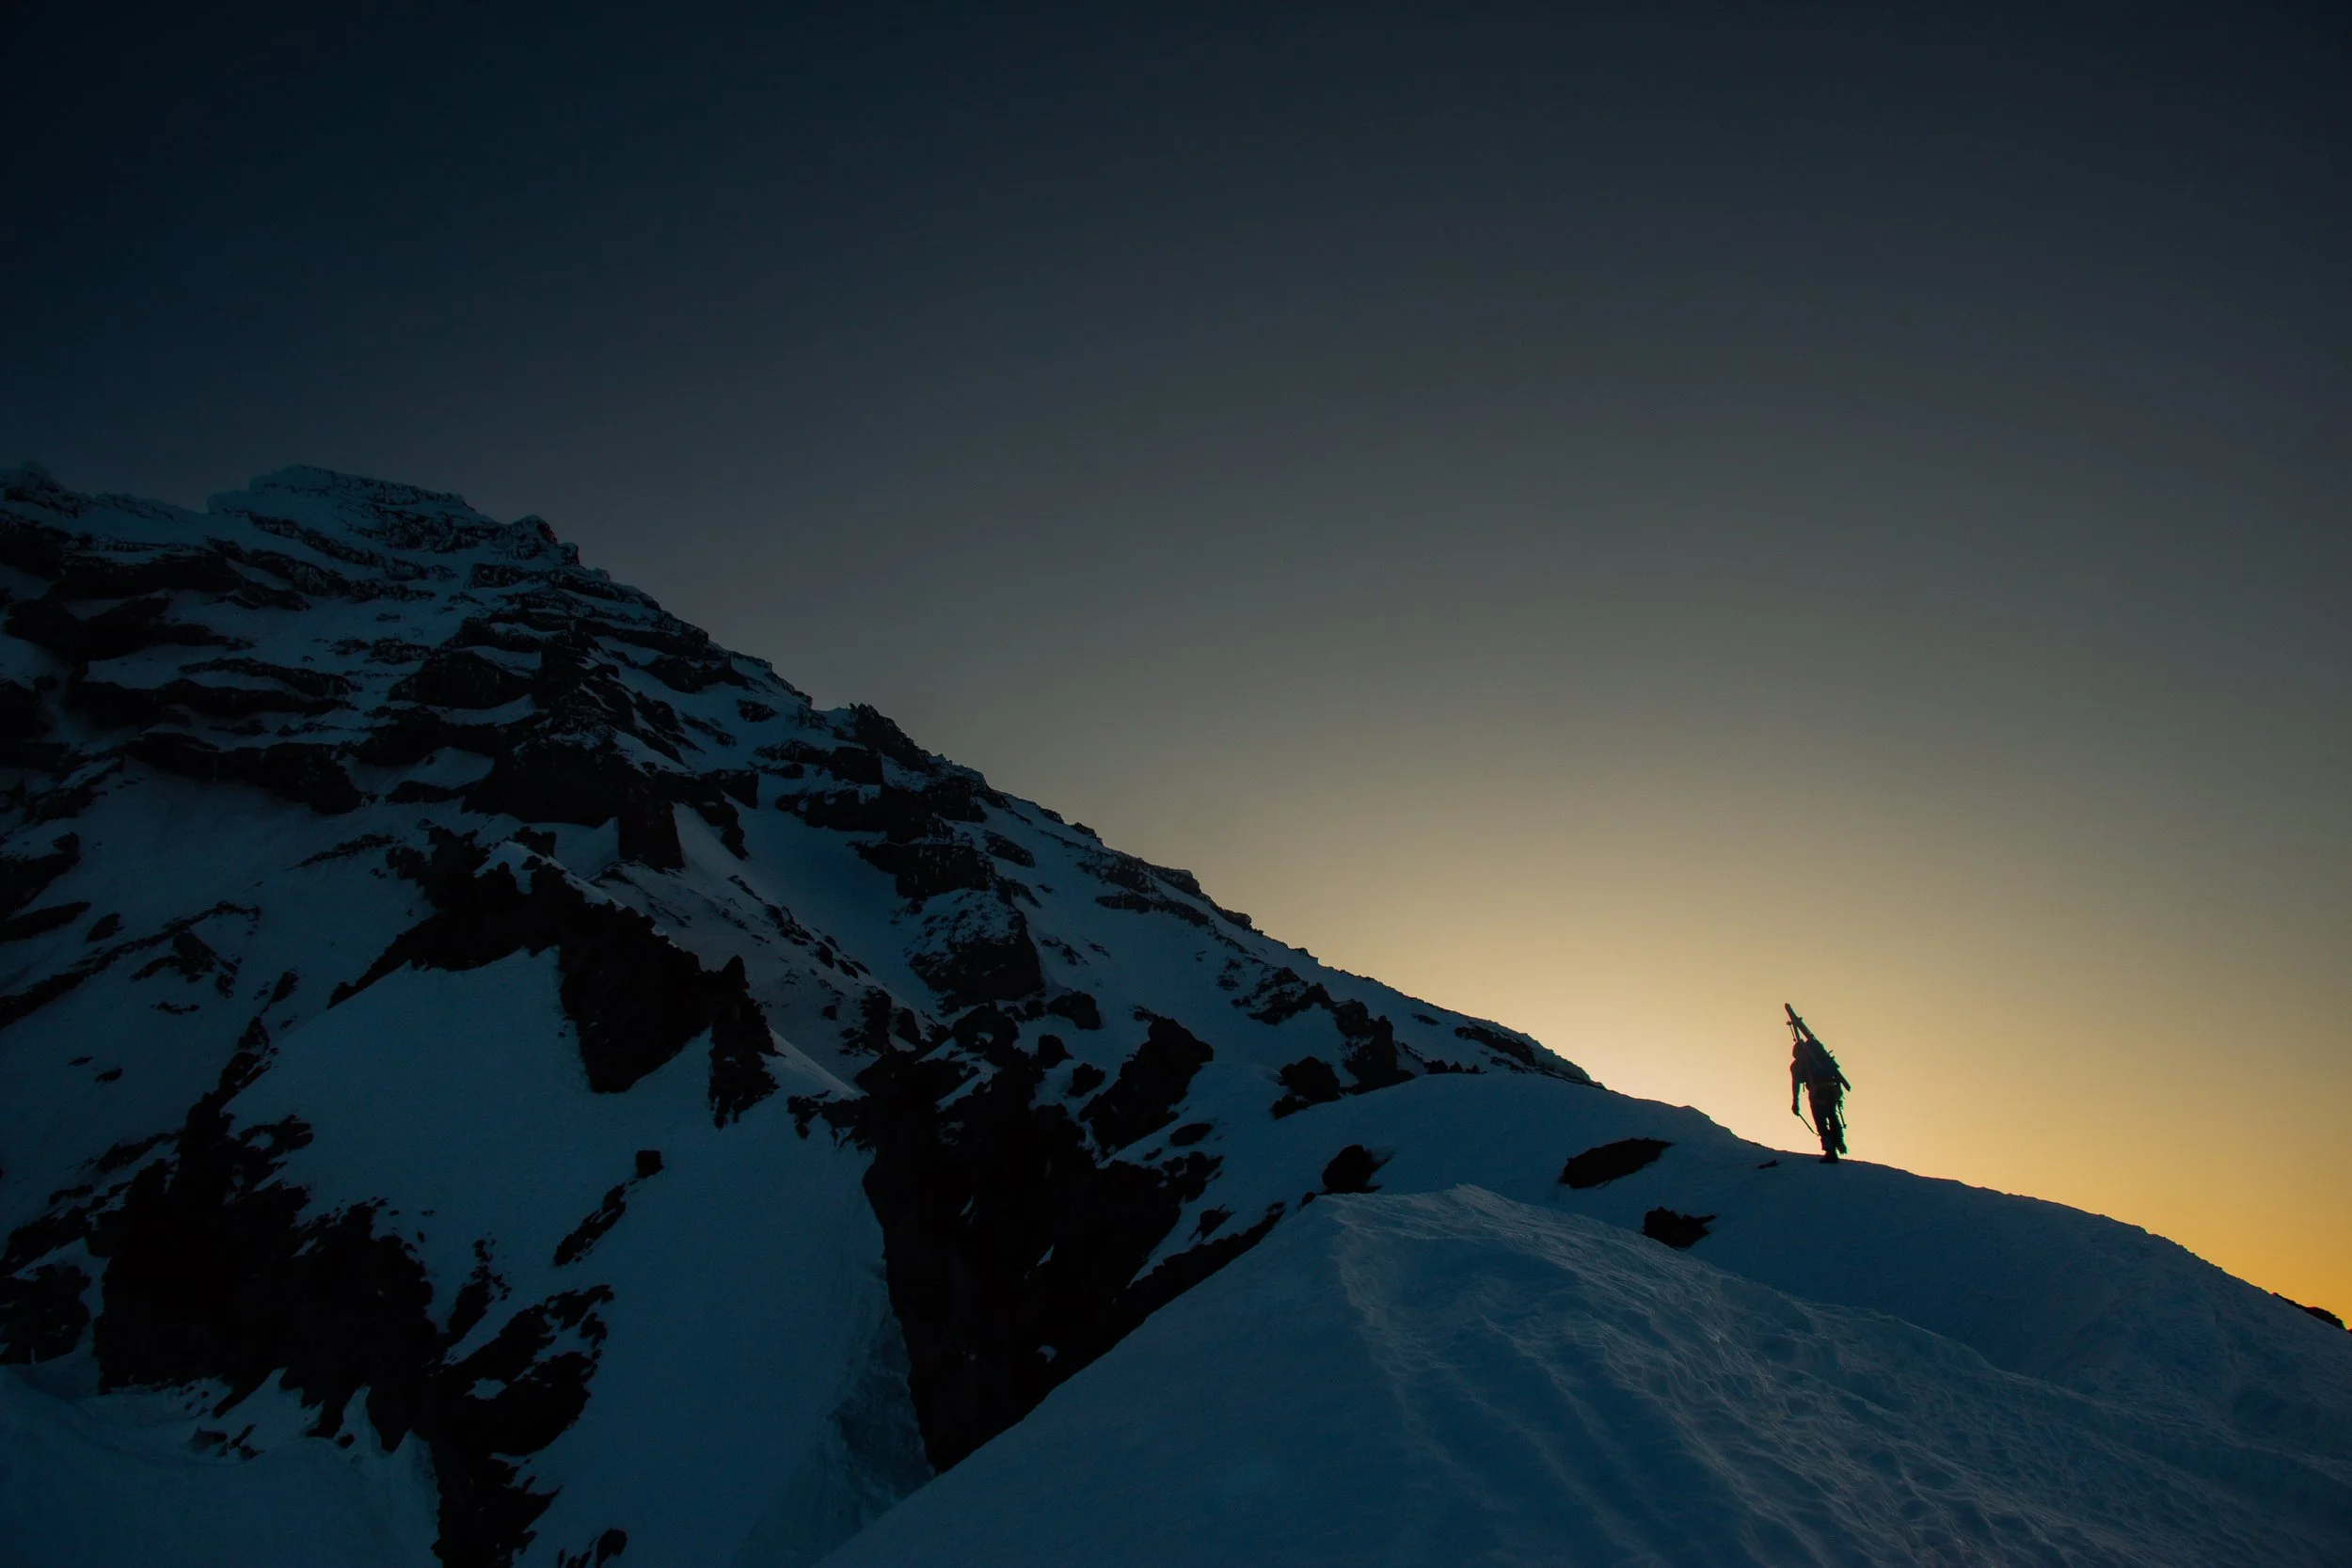
Here, the subject is small and on the right third. Silhouetted against the rising sun, he is traveling left, bringing the eye the the large snow and rock cliffs above. An early morning on the Success Cleaver, Mt. Rainier.
Tip 5: The Exposure Triangle in Climbing Settings
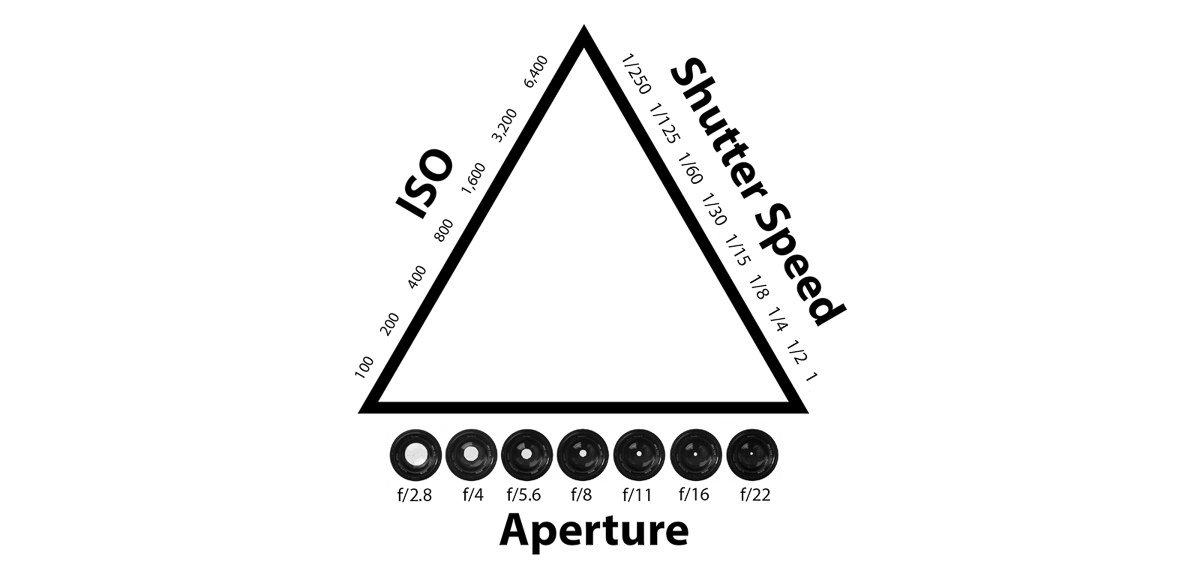
If you’re not familiar with the exposure triangle - check out this explanation here. Being able to adjust your settings is important while climbing. You face many more difficulties than your typical photographer. Weather, variable lighting, and dealing with rope systems, all create problems while you’re trying to get a perfect shot. Speed is necessary, and sometimes you may only have a moment. Automatic settings on a camera are always improving. If I am shooting outside of manual mode, I will typically use Aperture priority, where all I have to worry about is setting the aperture to get the effect I want. However, this can lead to your camera setting too high of an ISO, creating noise, or too slow of a shutter speed, creating unwanted blur. Shooting in manual mode, and capturing your photos in a RAW format, will give you the most control.

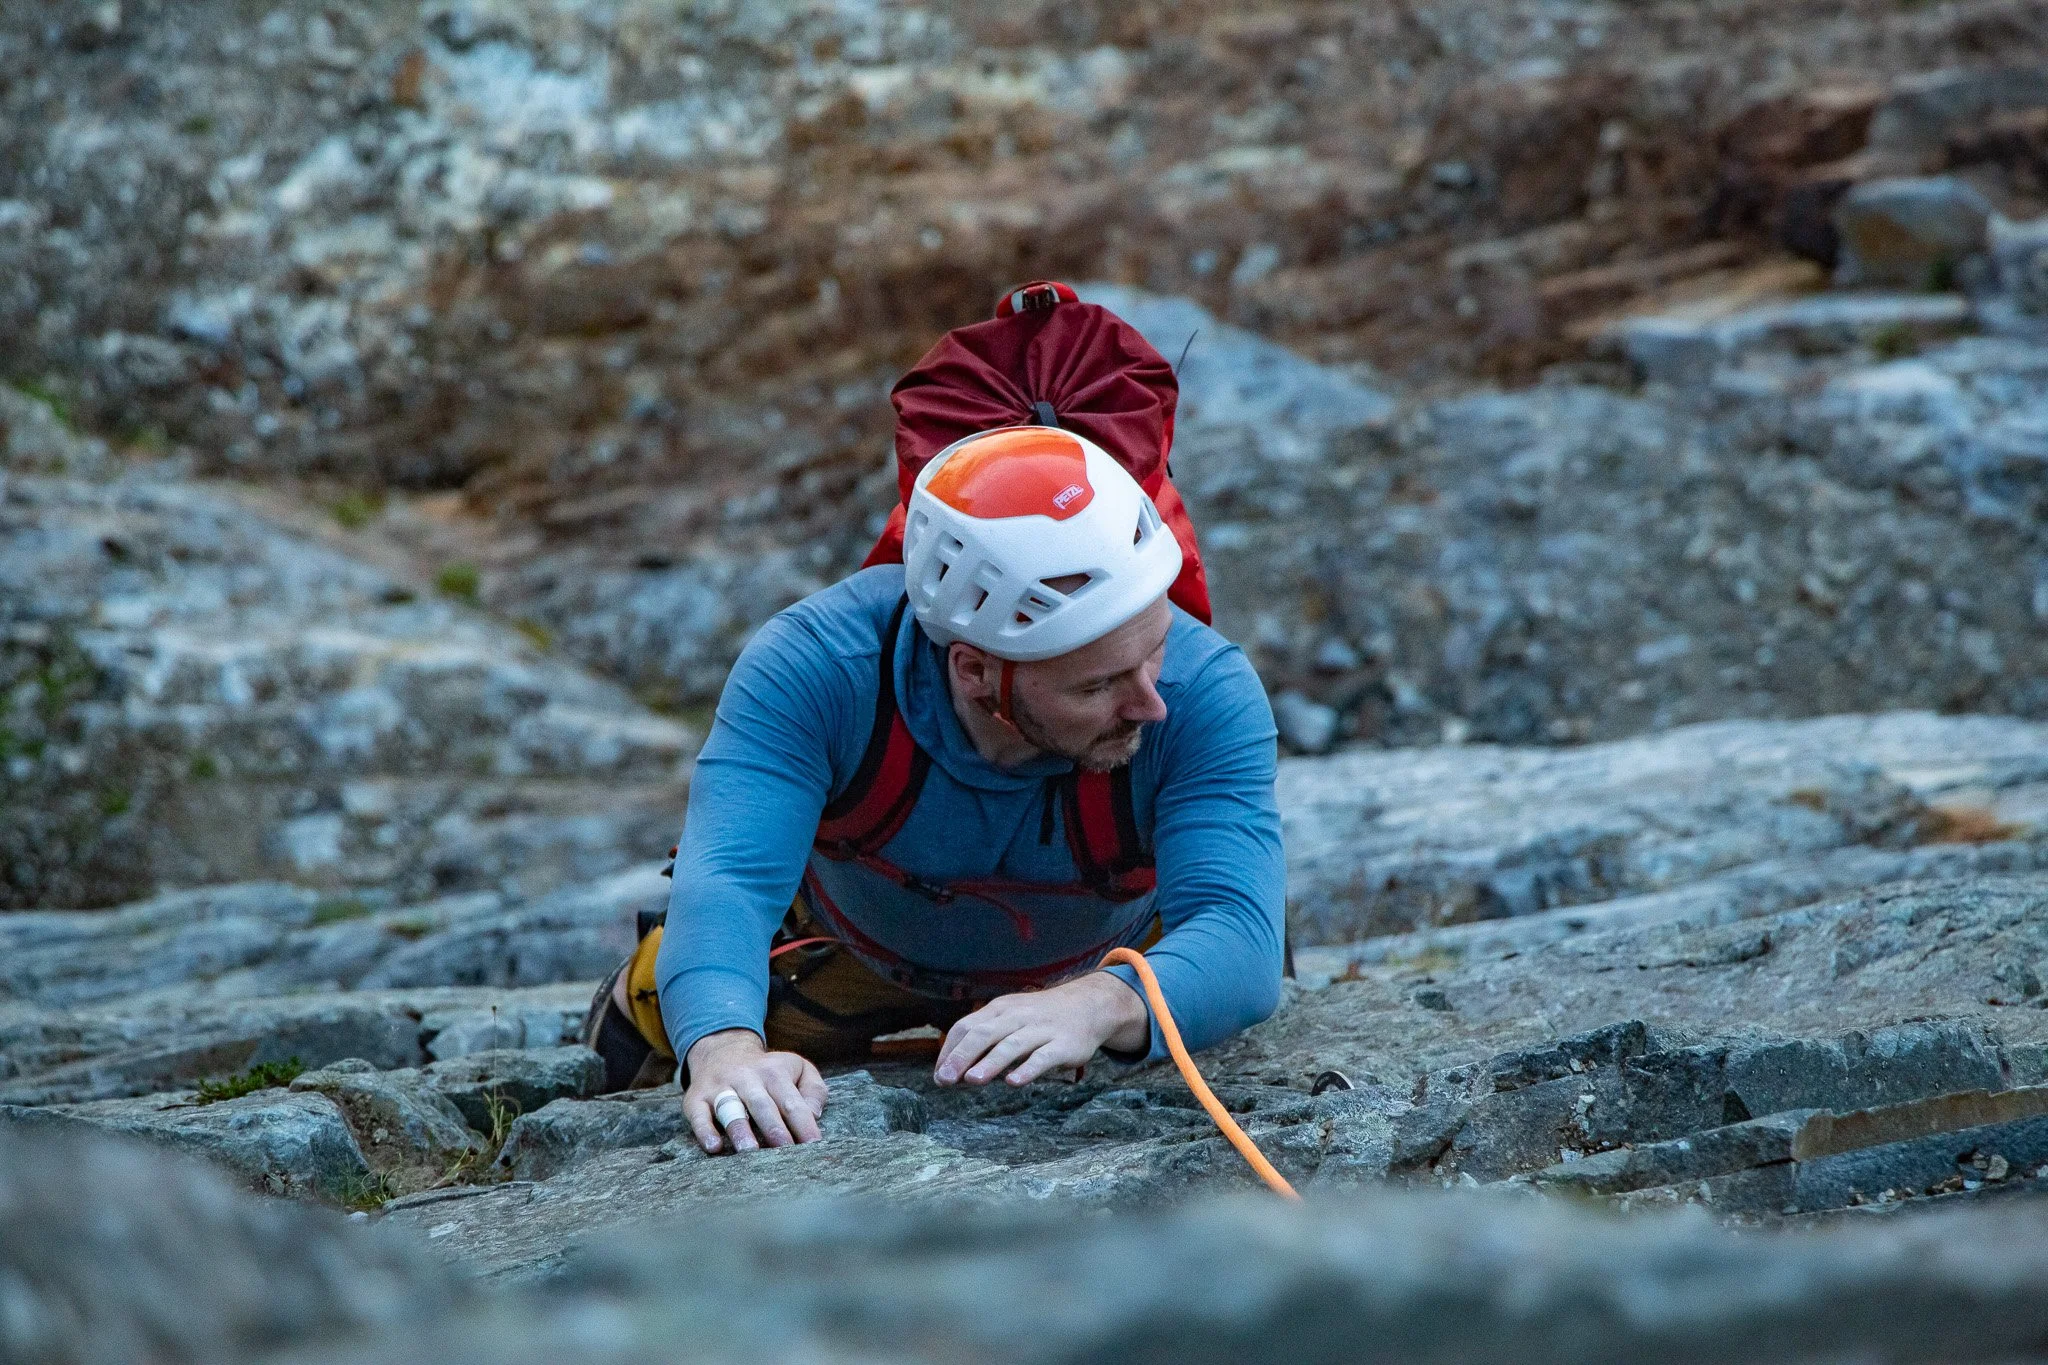
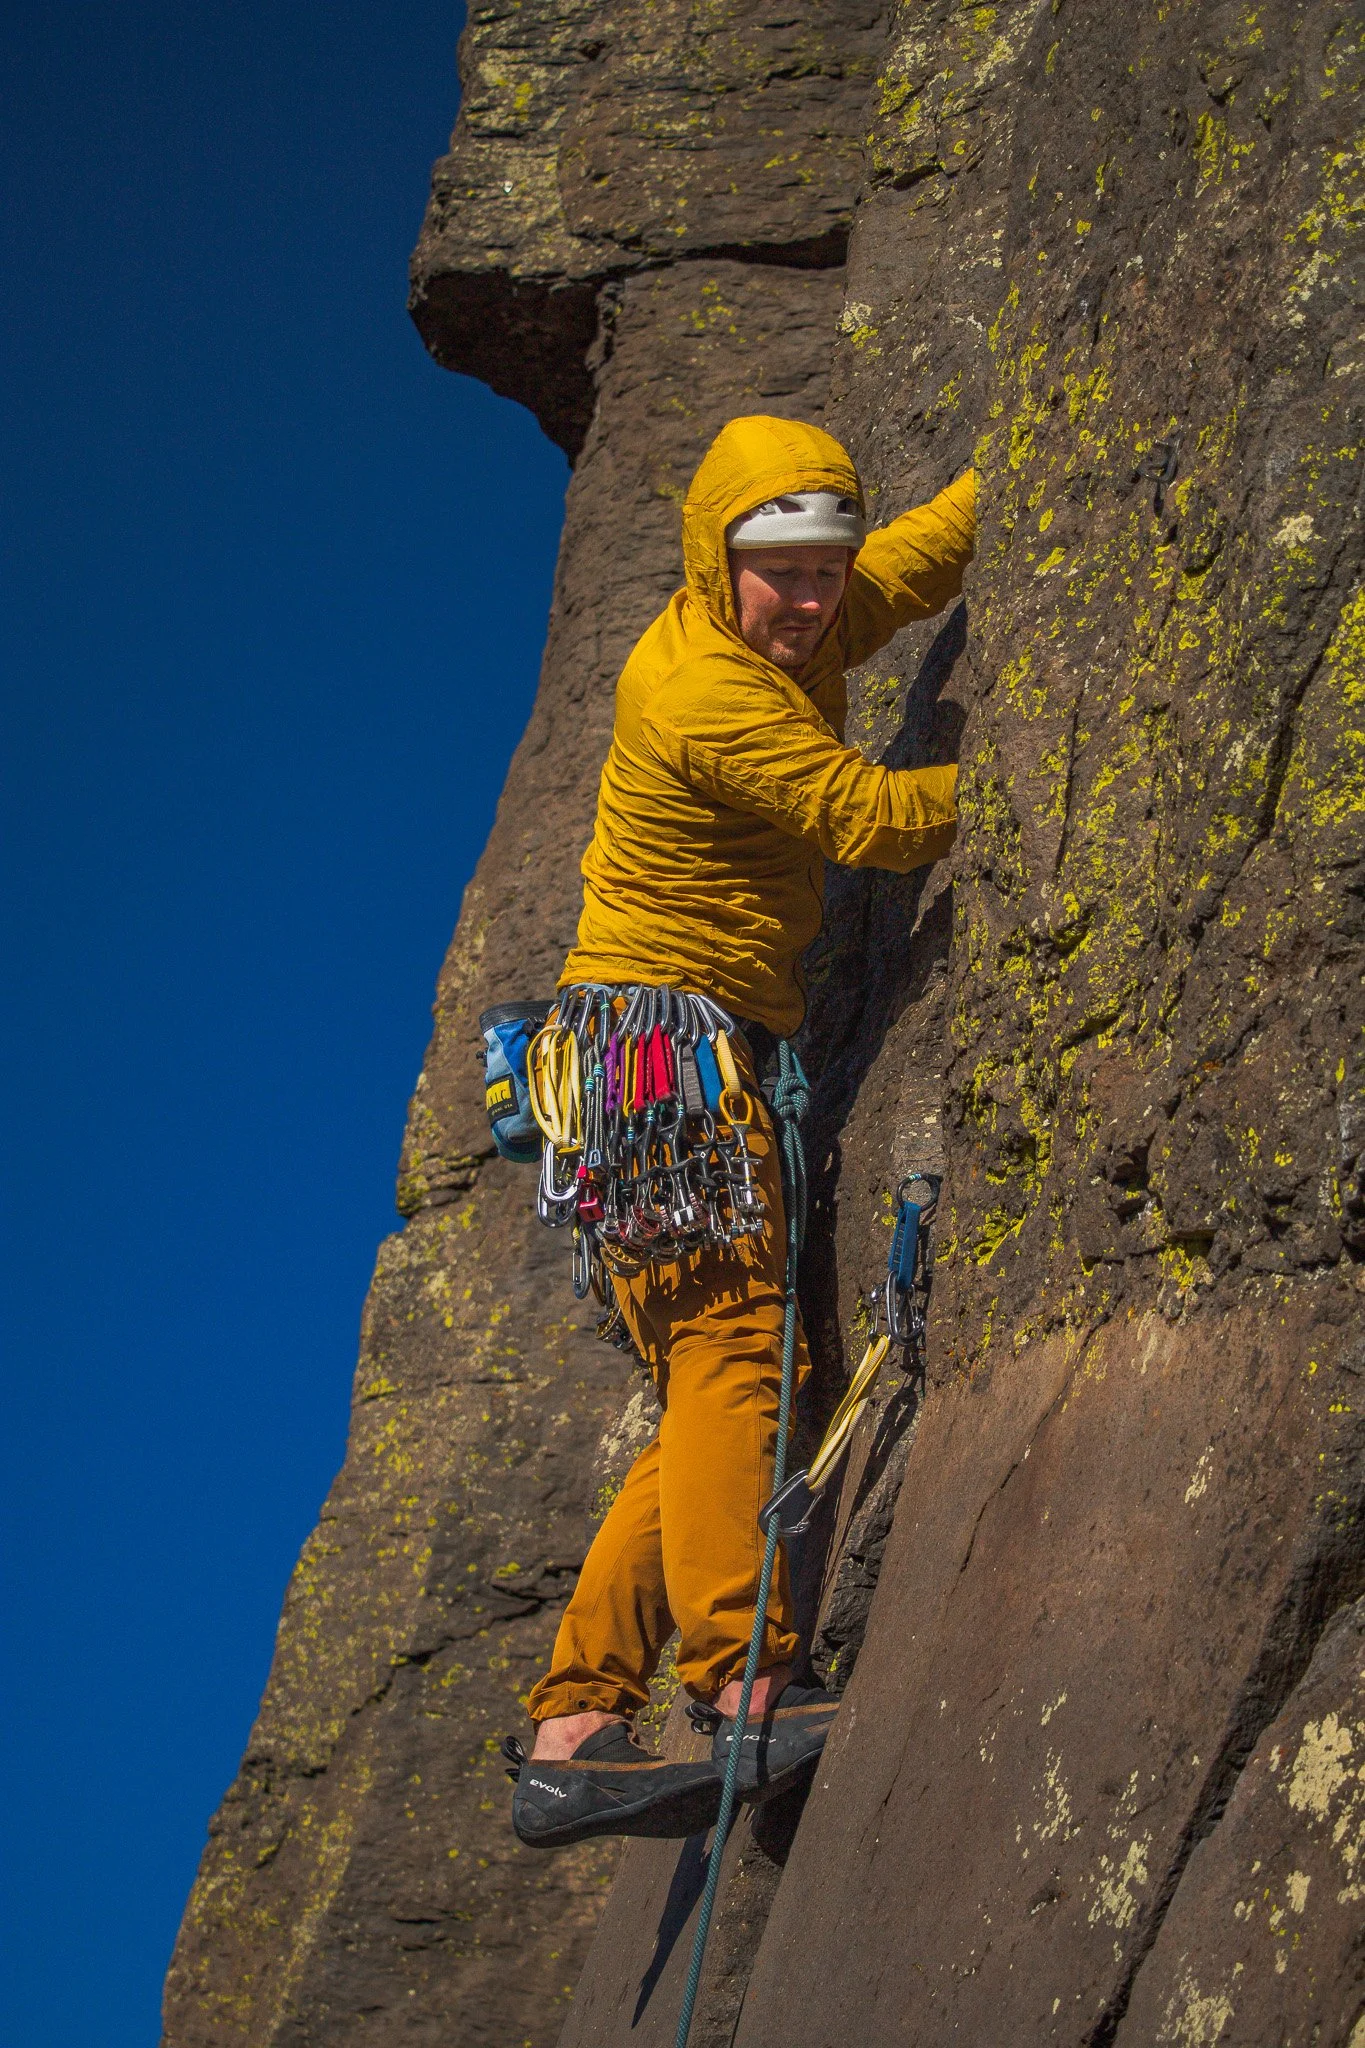
A shaded ice climb can make it difficult to get the settings right. Shooting in RAW can help preserve detail. Using color can also help. Here, the climber is wearing almost all black, blending into the background. However, the orange rope and yellow boots show up nicely. Contrasting clothing can help to make your subject stand out.
My typical process when I think there might be a photo opportunity starts out like this:
First, I figure out if I am trying to get a “hero shot”, highlighting the climber or certain subject point. Or, if I want more of an all encompassing photo with more in focus to show the bigger picture(depth of field). This will determine my aperture setting.
Second, I determine how fast my subject is moving. What is the action that is happening? This will determine my shutter speed.
Lastly, I figure out how low of an ISO I can set while still maintaining a correct exposure. Be prepared for the sun to suddenly be covered or uncovered by a cloud, and adapt. Often times you may get to the ISO, and realize you have to make a sacrifice on Aperture or Shutter Speed to prevent too much noise with a higher ISO.
Here, the sun is shining on the climbers face. Unlike in most photography scenarios, while climbing, you get the lighting you get, as it’s difficult to change the setting. However, pre-climb planning can help. Knowing the aspect of your climb, the weather, and where the sun is going to be can help you plan ahead, and predict where the best shots might be.
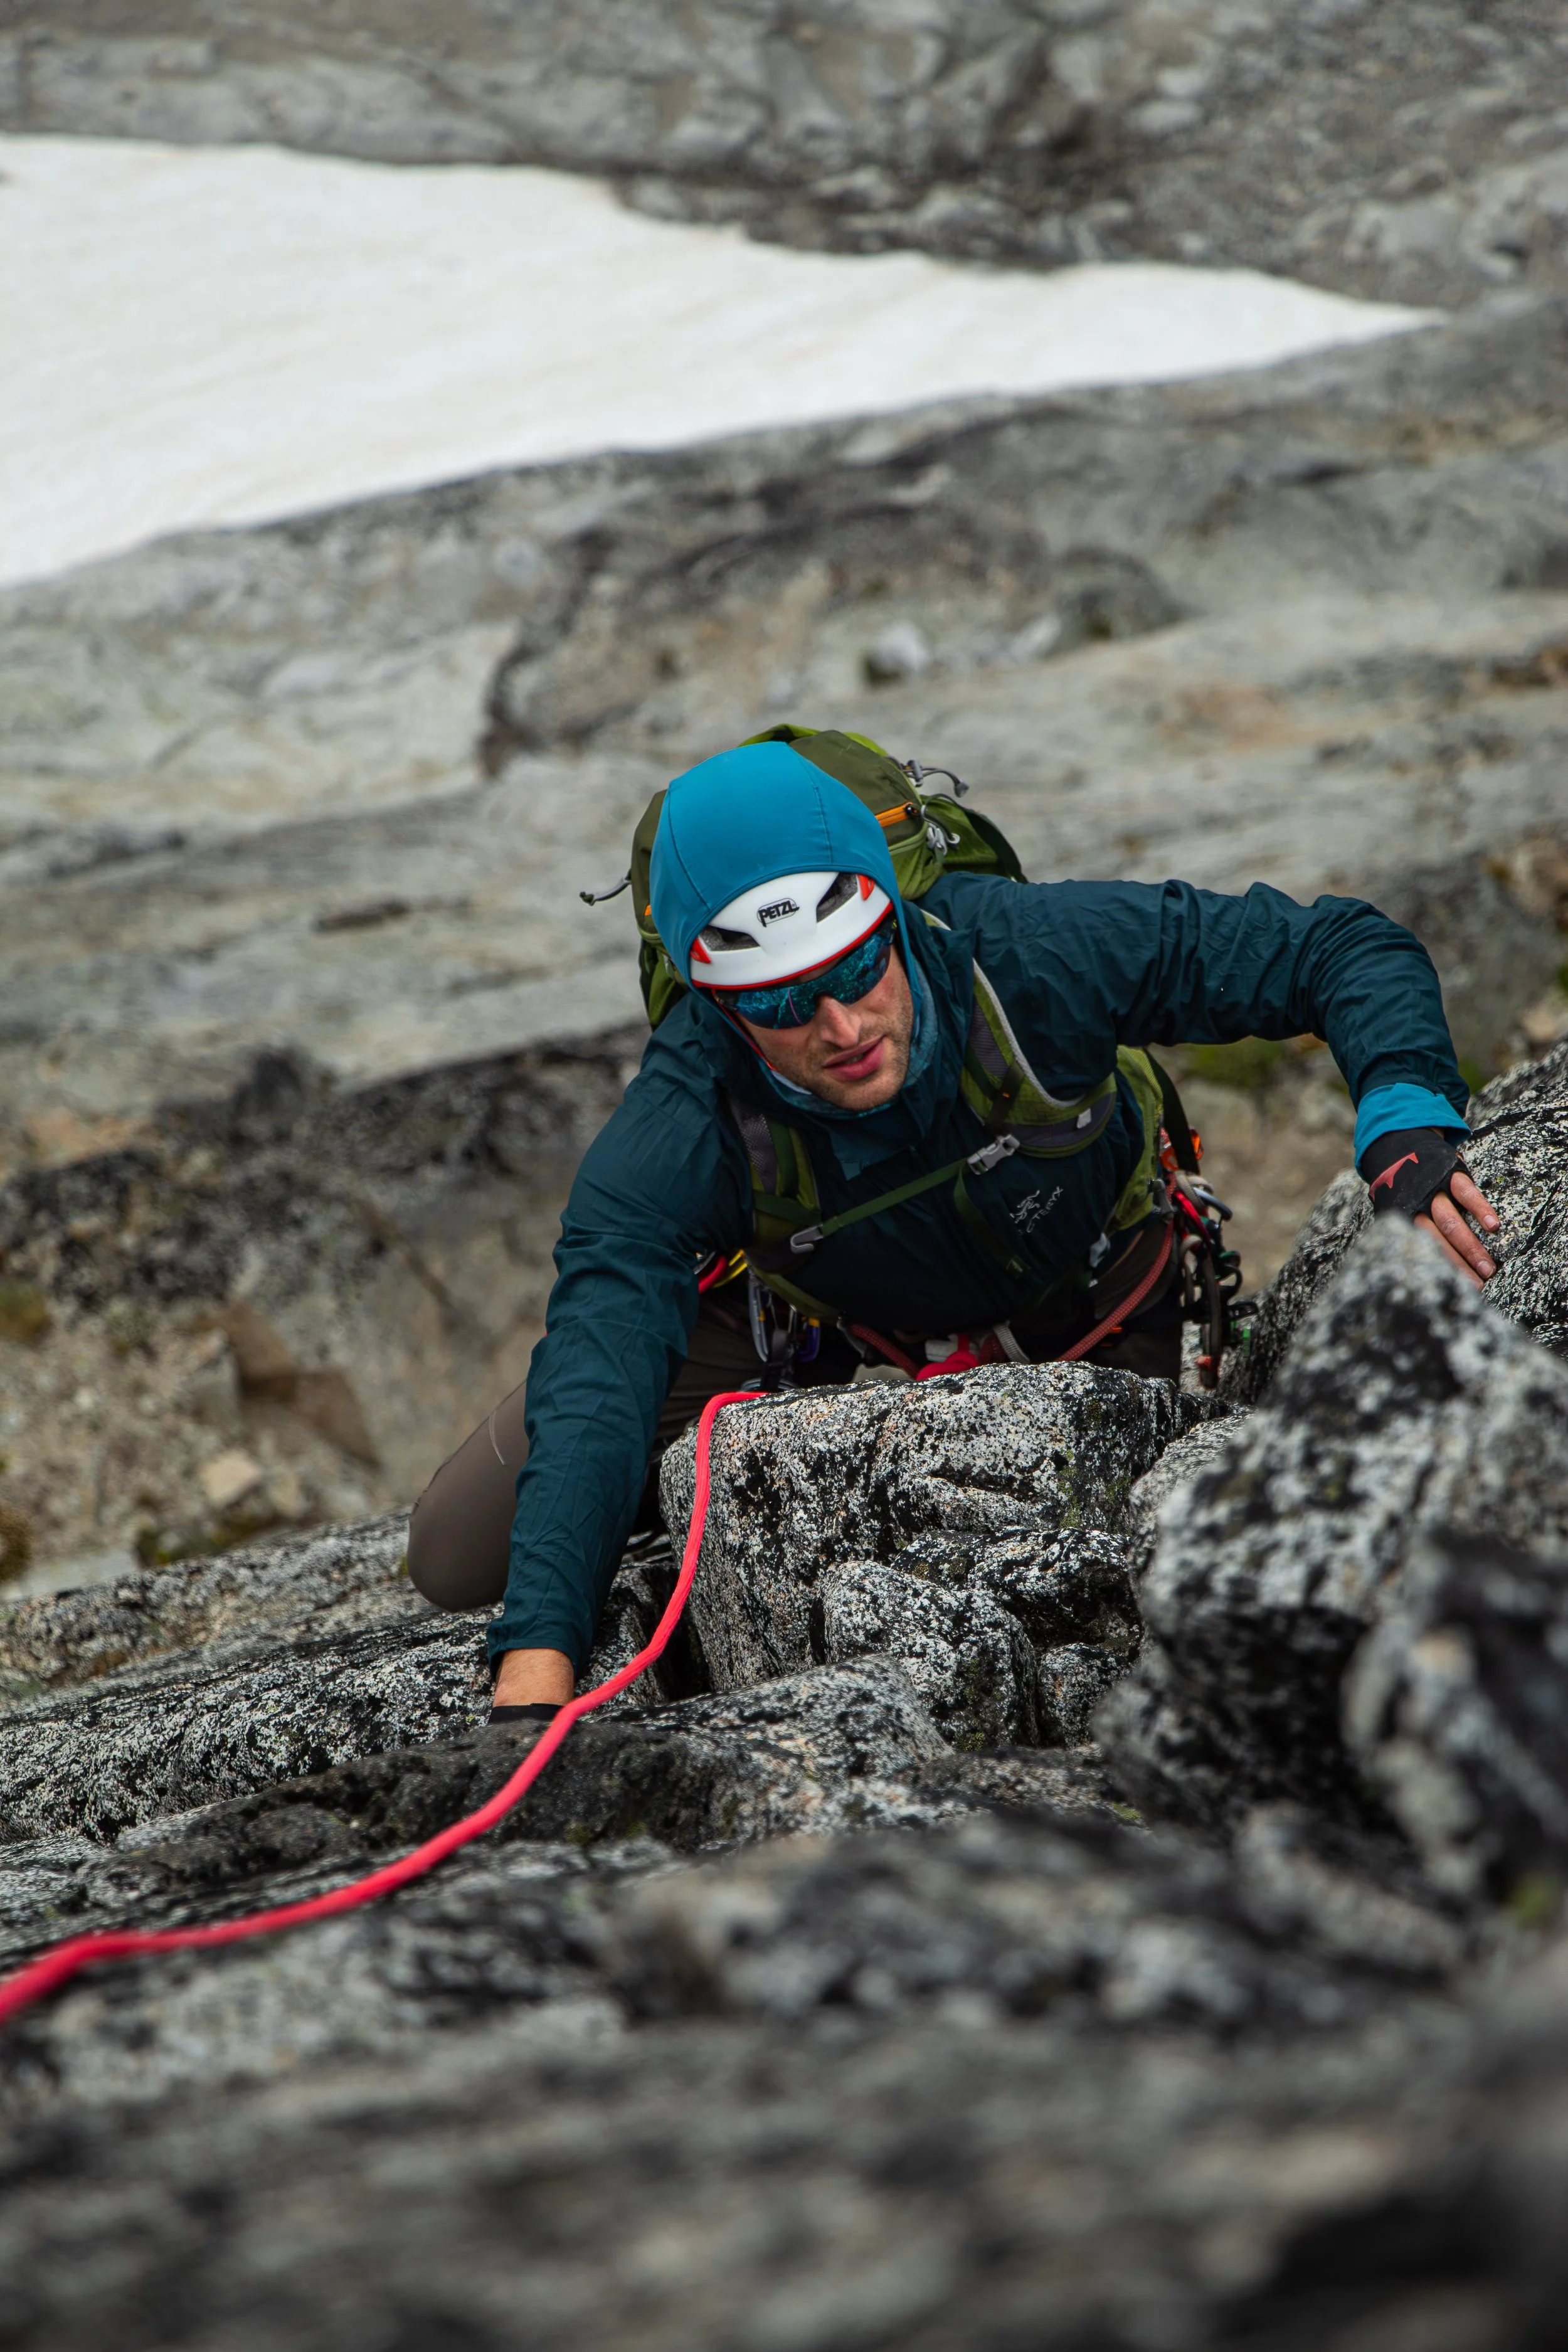
Here, a quick photo opportunity appeared. Being able to quickly get the settings right allowed me to capture a clear “hero shot” photo of the climber as he comes up the Fin on Backbone Ridge, Dragontail Peak.
So the next time you’re out climbing, try some of these tips, and see what you can create!